General Settings
General settings define the basic identity and regional configuration of your store. These settings appear on receipts, reports, and throughout the admin panel.
Accessing General Settings
- Log in to the Admin Panel.
- Click Settings in the top navigation bar.
- Click Edit Settings. The General tab is the first (default) tab.
Store Identity
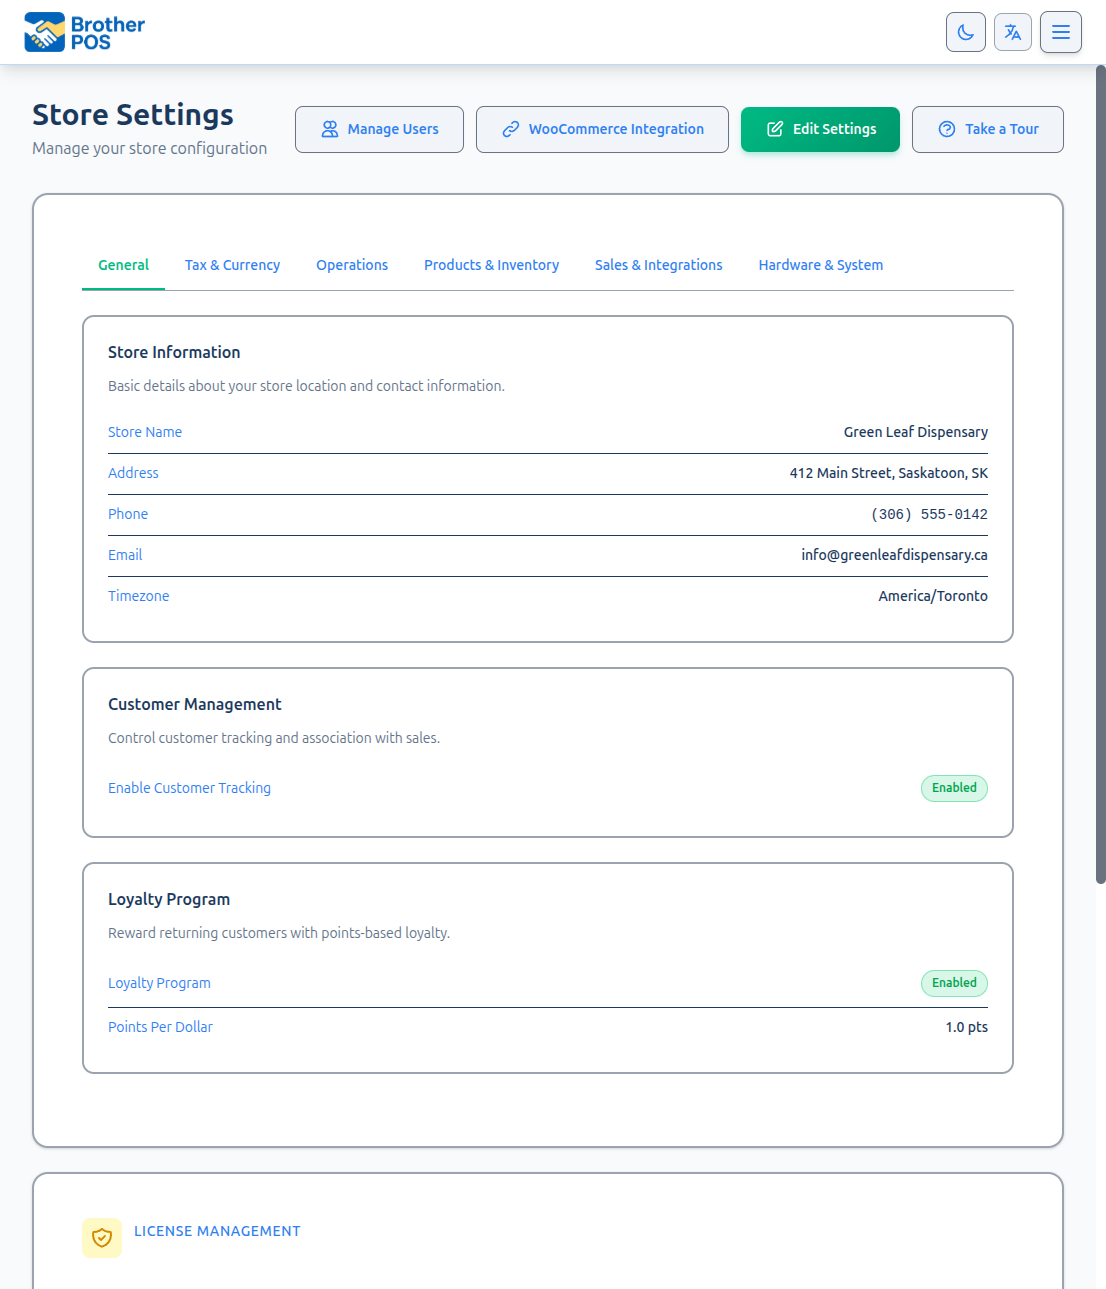
Store Name
The store name appears on:
- Receipts (header)
- Reports (header)
- Browser tab title
- Customer-facing displays
To update:
- Click the Store Name field.
- Type your store's name (e.g., "Green Leaf Dispensary").
- Click Save at the bottom of the page.
Use the name your customers recognize. If your legal entity name differs from your trade name, use the trade name here. The legal name can go in the address block.
Store Address
The address appears on receipts and may be used for compliance reporting.
Store Address is a single text field. Enter your full address in one field -- there are no separate fields for street, city, province, postal code, or country.
Contact Information
- Phone Number -- Appears on receipts and the admin header. Use the number customers should call.
- Email Address -- Used for system notifications and appears on receipts if configured.
Regional Settings
Timezone
The timezone setting controls how dates and times are displayed throughout Brother POS.
- Enter the timezone in the Timezone text field (e.g., "America/Toronto" for Eastern Time, "America/Regina" for Saskatchewan). This is a text input, not a dropdown.
- Click Save.
Changing the timezone affects how sales are grouped by date in reports. A sale at 11:30 PM Eastern would appear on a different date if the timezone were set to Pacific. Set this correctly during initial setup and avoid changing it afterward.
Common Canadian timezones:
| Timezone | Provinces |
|---|---|
| America/St_Johns | Newfoundland |
| America/Halifax | Nova Scotia, New Brunswick, PEI |
| America/Toronto | Ontario, Quebec |
| America/Winnipeg | Manitoba |
| America/Regina | Saskatchewan |
| America/Edmonton | Alberta |
| America/Vancouver | British Columbia |
Currency
The currency setting determines the currency symbol shown in the POS, reports, and receipts.
- Enter the currency symbol in the Currency text field (e.g., "$"). This is a text input for the symbol character, not a dropdown of currency codes.
- Click Save.
Brother POS displays all monetary values with the selected currency symbol (e.g., $45.99 CAD). Changing the currency does not convert existing prices -- it only changes the display symbol. All prices are assumed to be in the selected currency.
The SLGA Site ID for Saskatchewan compliance reporting is configured on the Tax & Currency tab under Saskatchewan Compliance, not on the General tab.
Customer Management
The General tab includes a toggle for enabling or disabling the customer management feature.
- Enable Customers -- When enabled, cashiers can look up and attach customer profiles to sales. When disabled, all sales are anonymous and customer-related features are hidden throughout the POS and admin panel.
Loyalty Program
The General tab also includes basic loyalty program configuration:
- Loyalty Enabled -- Toggle to enable or disable the loyalty points program store-wide.
- Loyalty Points per Dollar -- The number of loyalty points awarded per dollar spent. For example, a value of 1 means customers earn 1 point for every $1 spent.
For detailed loyalty program setup including tiers and rewards, see Loyalty Setup.
Saving Changes
After making any changes:
- Scroll to the bottom of the page.
- Click the Save button.
- A confirmation message appears at the top of the page.
If you navigate away from the page without saving, your changes will be lost. Always click Save before leaving the settings page.
Settings and Multi-Store
If you operate multiple stores, each store has its own general settings. Changes to one store's settings do not affect other stores.
Store owners can switch between stores from the Owner Dashboard to configure each store individually.
Common Questions
Do receipt settings update immediately? Yes. After saving, the next receipt printed will use the updated information.
Can I use a different name on receipts vs. the admin panel? Currently, the store name is the same everywhere. If you need different display names, contact support for assistance.
What happens if I leave fields blank? Blank fields are simply omitted from receipts and reports. A missing phone number, for example, will not create a blank line on the receipt.
What's Next?
- Tax Configuration -- Set up your tax rates and split-tax rules.
- Operations -- Configure receipt settings and order numbering.
- Product Display -- Control which product details appear in the POS.