Making a Sale
This guide walks you through the complete process of ringing up a customer, from finding products to collecting payment and printing a receipt. Every sale in Brother POS follows the same core flow, regardless of the products involved.
Before You Begin
Make sure the following are in place before processing your first sale:
- You are logged in to the POS register screen (the touch-friendly register interface).
- A cash drawer session is open for your register. If no session is active, a manager or admin must open one first.
- Your register is assigned and selected (if your store has more than one).
The POS register screen is a Progressive Web App (PWA). It works in any modern browser and can be installed to the home screen on tablets for a native-app feel.
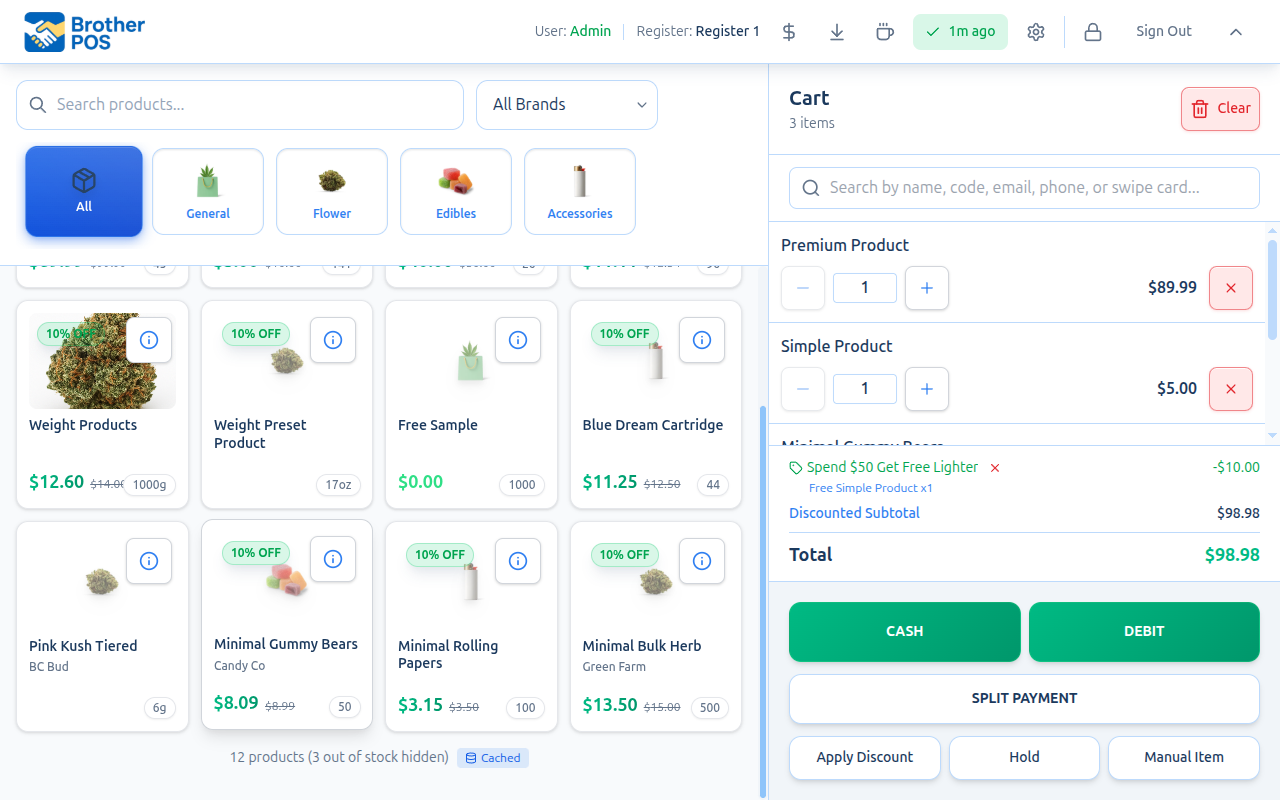
The POS Layout
The register screen is split into two main areas:
| Area | Location | Purpose |
|---|---|---|
| Product Pane | Left side | Search bar, category filters, brand filters, and the product grid |
| Cart Pane | Right side | Line items, totals, customer selection, and payment buttons |
On mobile devices, the product grid takes the full screen and the cart slides in from the right when you tap it.
Step-by-Step: Processing a Sale
1. Find the Product
You have several ways to locate a product:
- Type in the search bar at the top of the product pane. Results filter in real time as you type.
- Scan a barcode using a USB or Bluetooth barcode scanner. The product is added to the cart automatically.
- Browse by category using the category tabs below the search bar.
- Browse by brand using the brand filter.
For full details, see Product Search and Scanning.
2. Add to Cart
Standard products -- tap the product card once. It appears in the cart on the right with a quantity of 1.
Weight-based products -- tapping the product card opens a weight selection modal. Choose from the admin-configured weight presets for the product, or enter a custom weight. Per-gram products also show quick-select buttons for common weights (1g, 3.5g, 7g, 14g, 28g). See Weight-Based Products for details.
Products with variations -- tapping the card opens the variation picker, where you select the specific size, color, or other option. See Modifiers and Variations.
Products with modifiers -- a modifier selection modal appears letting you choose add-ons, toppings, or customize the item. Required modifier groups must be satisfied before adding.
3. Review the Cart
The cart pane shows:
- Each line item with name, quantity, unit price, and line total
- Quantity controls (+/- buttons) to adjust amounts
- A delete column (permanently visible on mobile) or X button (on desktop) to remove items
- The Subtotal, Tax, and Total at the bottom
You can also:
- Tap Discount to apply a percentage, dollar, or final-price discount
- Tap Manual Item to add a custom line item not in your product catalog
- Tap Hold to save the current cart and start a new one
For more on managing the cart, see Cart Management.
4. (Optional) Attach a Customer
Tap the customer search area at the top of the cart pane to look up or create a customer record. Attaching a customer:
- Earns them loyalty points on this sale
- Applies any tier-based automatic discounts
- Makes the sale appear in their purchase history
- Enables loyalty point earning and customer-linked sale tracking
5. (Optional) Apply Discounts or Promotions
Tap the Discount button below the cart to open the discount modal. From there you can:
- Select an active sale campaign that applies automatically
- Redeem loyalty rewards if a customer is attached
- Apply a manual discount (percentage, dollar off, or final price override)
If you are a cashier without discount permissions, a manager PIN is required. See Applying Discounts.
6. Choose a Payment Method
When you are ready, tap one of the payment buttons at the bottom of the cart:
| Button | What Happens |
|---|---|
| CASH | Opens the cash modal with numpad, quick-amount buttons, and change calculation |
| DEBIT | Records a debit card payment (or sends to a payment terminal if configured) |
| E-TRANSFER | Records an e-transfer payment with optional reference number (if enabled in store settings) |
| STORE CREDIT | Applies a customer's store credit balance to the sale (when enabled in store settings) |
| SPLIT | Opens split payment mode to divide the total across multiple methods |
Only enabled payment methods appear. Your admin configures which methods are available in Store Settings.
For full payment details, see Completing Payment and Split Payments.
7. Complete the Sale
After confirming payment:
- The system records the sale and updates inventory.
- A success screen appears showing the total and, for cash payments, the change due.
- If auto-print is enabled on your register, a receipt prints automatically.
- The cart clears and is ready for the next customer.
Tap Start New Sale to return to the product grid.
Quick Sale Example
Here is a typical transaction at a cannabis dispensary:
- Customer asks for a 3.5g of Blue Dream.
- You type "Blue Dream" in the search bar -- the product card appears.
- Tap the card -- the weight selection modal opens.
- Tap 3.5g -- the item appears in the cart at the tier price (e.g., $35.00).
- Customer also wants rolling papers -- scan the barcode, and papers are added at $3.99.
- Subtotal: $38.99. Tax (13% HST): $5.07. Total: $44.06.
- Customer pays cash -- tap CASH, tap the $50 quick button, see change of $5.94.
- Tap Complete Sale -- receipt prints, change amount shown on screen.
Keyboard Shortcuts
Power users can speed up sales with keyboard shortcuts:
| Shortcut | Action |
|---|---|
| Focus search bar | Automatic on page load |
Enter after barcode scan | Adds scanned product to cart |
Barcode scanners act as keyboard input. When you scan a barcode, the POS automatically detects the rapid input (under 80ms between keystrokes) and processes it as a scan rather than manual typing.
Offline Sales
If the network goes down, Brother POS continues to work. Sales are saved locally and automatically sync when connectivity returns. A status indicator in the header shows your connection state.
Some features are limited while offline: customer lookup may use cached data, loyalty points cannot be verified in real time, and sale campaigns may not reflect the latest changes.
What's Next?
- Product Search and Scanning -- all the ways to find products
- Cart Management -- adjust quantities, remove items, add manual items
- Applying Discounts -- percentage, dollar, and final price discounts
- Completing Payment -- cash, debit, and e-transfer flows
- Receipts -- printing and reprinting receipts