Stock Adjustments
Use this page when the stock number in Brother POS doesn't match what's really on the shelf — to count it, receive it, or write it off.
Quick steps
At the register:
- Tap the gear icon in the top bar. Under Quick Actions, tap Stock Adjustment.
- Find the product — type its name or SKU, or scan its barcode.
- Pick what happened: Receive (stock arrived), Inventory (you just counted it), or Spoilage / Damage (stock to write off).
- If your store has a Sales Floor and Back Stock, tap the location the stock is on.
- Enter the quantity. For Inventory, type what is physically on the shelf — Brother POS works out the difference. For a Receive, check the Cost per unit too.
- Tap Adjust Stock (it says Record Count for an Inventory count). Every change is recorded with who made it and why.
In the back office:
- Go to Products and open the product, then its Inventory tab.
- Under Check in / check out, enter the Quantity.
- To add stock, fill in Paid per unit ($) and click Check in. To take stock out, pick a Reason and click Check out.
Type what you see on the shelf, not how many to add or take away. Zero is a real count — it means the shelf is empty.
Common questions
I can't see Stock Adjustment at the register. Your role needs the Adjust Stock at the Register permission. Ask an admin to tick it; it can take up to an hour to reach the till.
The stock box on the product page is greyed out. The product's stock is split across locations. Under Inventory by location, type what you counted into that location's Counted box and click Set.
Does a count or a write-off change what the product cost me? No. Only stock arriving with a price — a Receive or a Check in — changes the cost.
Can I adjust stock while the register is offline? No, the Stock Adjustment screen needs a connection. Moving stock between shelves does work offline and syncs later.
The register says "Not on the sales floor". The floor is short but back stock has enough. Tap Move … to floor to bring out just what's needed.
More detail: who can change stock, and every way stock changes
Who Can Change Stock
Changing how much stock exists is covered by two permissions: Adjust Stock for the admin panel's stock screens, and Adjust Stock at the Register for the till. Admins always have both, and managers have both by default. Clerks have the register one only, so they can record an adjustment or a reweigh at the till but not open the admin stock screens. You can change either per role — see Roles and Permissions.
Without that permission, a user cannot:
- See Stock Adjustment or Reweigh (called Shake / Reweigh on cannabis stores) under Quick Actions in the register's Settings menu.
- Use the Count button on a location at the register.
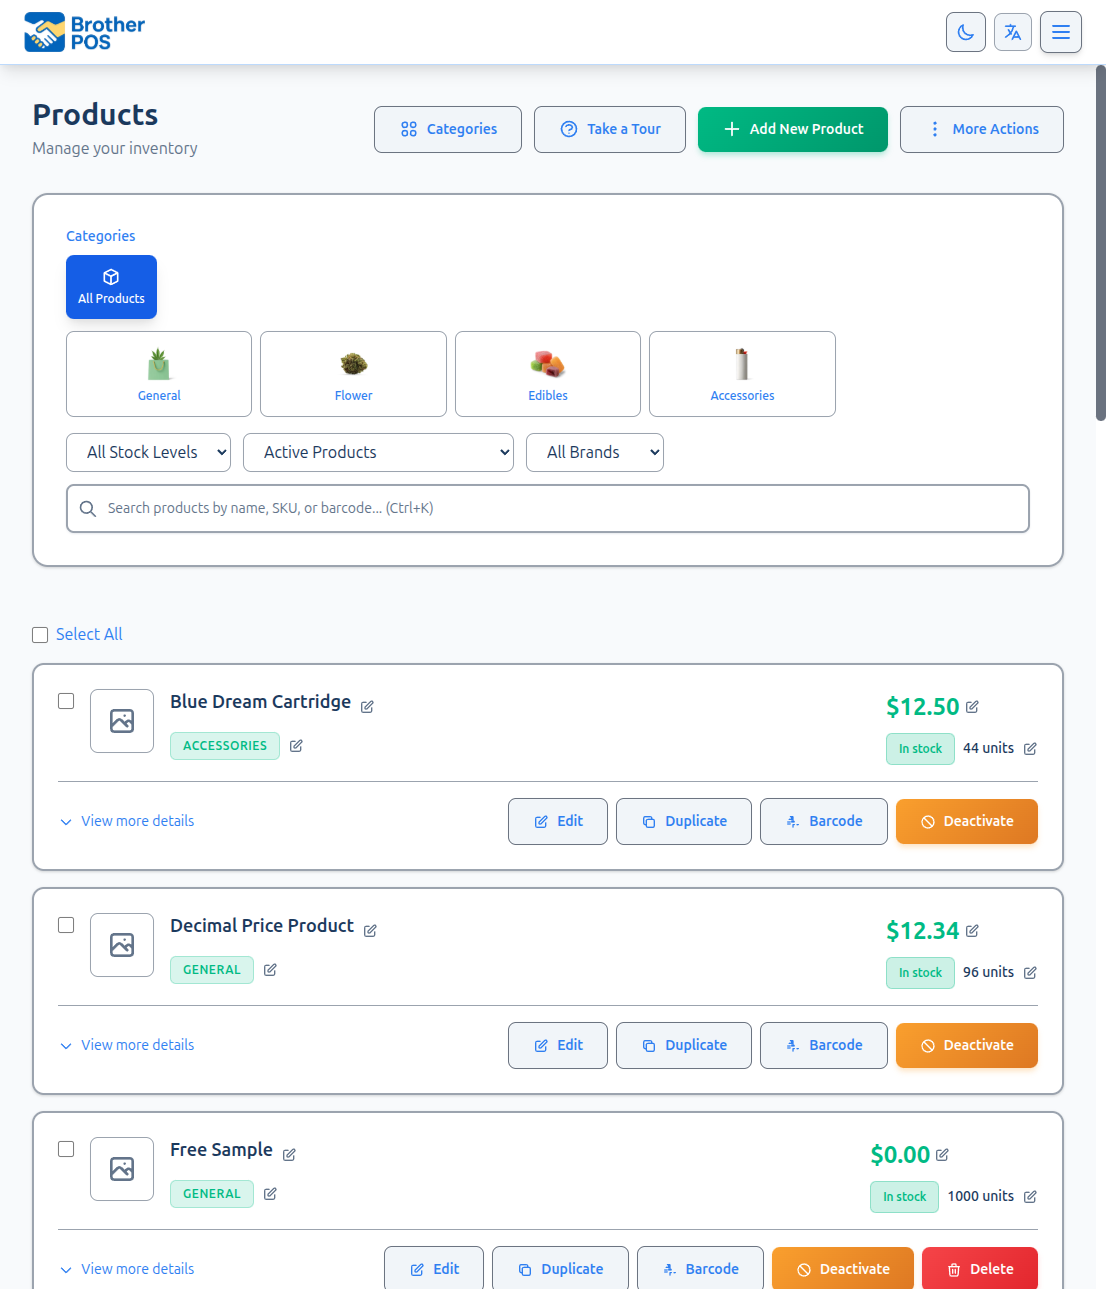
- Use the quick stock edit (the pencil) on the Products list, the Current Stock box or a location's Counted / Set on the product page, or the Check in / check out forms.
- Change stock in bulk on the Bulk Operations page (the Stock tab says they don't have the permission).
Moving stock between locations is different. It does not change how much you have, only where it sits, so it is treated as the smaller act. At the register, either permission allows it: a clerk who holds Adjust Stock at the Register can move stock between shelves as well as adjust it. In the admin panel, the move tools on the product page need Adjust Stock or Manage Products.
Ways Stock Changes
Changes you make
| Where | Best for |
|---|---|
| Register → Stock Adjustment | Receiving, counting and writing off stock without leaving the till. |
| Register → product details → Inventory by location → Count | Counting one shelf, for example the Sales Floor each morning. |
| Products list → pencil next to the stock number | A quick correction in the back office. |
| Product page → Inventory tab | Setting the stock on a single product, or counting each location. |
| Product page → Inventory tab → Check in / Check out | Recording a delivery with what you paid for it, or taking stock out with a reason. |
| Products → More Actions → Bulk Operations → Stock (admins) | Adding, subtracting or setting stock on many products at once. |
Changes the system makes for you
- Sales take stock off; voided sales and returns put it back.
- Purchase order receiving and Scan to Receive add stock. Receiving a purchase order also blends what you paid into the product's cost, the same way a check-in does. See Purchase Orders and Scan to Receive.
- Stock transfers move stock from one store to another, including which shelf it leaves and lands on. See Stock Transfers.
- Product issues — logging a moldy, defective, expired or damaged product with a refund or courtesy replacement takes one unit out of stock. See Product Issues.
More detail: stores that split stock between Sales Floor and Back Stock
Stores That Split Stock by Location
If your store keeps stock in more than one place, such as a Sales Floor and Back Stock, every product's total is the sum of its locations. The Sales Floor is the stock the register sells (marked sellable).
When you add or remove stock without choosing a location, Brother POS uses these rules:
| Change | Where it goes |
|---|---|
| Received stock | Back Stock |
| Any other increase (a count that found more, a void, a return) | Sales Floor |
| Any decrease | Comes off the Sales Floor first; if the floor runs out, the rest comes out of back stock |
That is often right, but not always. If a delivery goes straight onto the shelf, or the spoiled tray was in the back, choose the location yourself. Every screen below lets you choose.
Say you have 53 on the Sales Floor and 37 in Back Stock (90 in total). You count the floor and find 50. Count the Sales Floor as 50. Brother POS takes 3 off the floor and leaves Back Stock alone, so the total becomes 87.
If you typed 87 as a new total, Brother POS would have to guess which shelf was short.
Once a product has stock in more than one location, the total is not something you type:
- On the product page, the stock field becomes Total Stock (All Locations). It is read-only and shows the split underneath. Correct a location by typing what you counted into its Counted box under Inventory by location and clicking Set.
- On the Products list, the quick edit no longer offers Total. It starts on the Sales Floor.
A product whose stock is all in one place keeps the ordinary editable stock field.
To move stock that is already counted but in the wrong place, use the move tools on the product page in the admin panel. Moving never changes the total.
The register sells from the Sales Floor
On a store that splits stock, the register only sells what is on the Sales Floor. If a clerk rings up more than the floor holds while back stock has more, the item isn't added. Instead the register asks:
Not on the sales floor — Blue Dream: 2g on the sales floor, 420g in back stock. Bring 12g out to the floor to sell it?
Tap Move 12g to floor and Brother POS moves just the shortfall out of back stock and then adds the item to the cart. The clerk needs Adjust Stock at the Register (or Adjust Stock) to make the move — the same permission as the other move tools.
This happens even on a product that is allowed to sell into negative stock: the stock is there, it just isn't out front. When the whole store is out — floor and back — the usual out-of-stock rules apply instead. Bundles, products sold in pack levels and parents with variations aren't checked this way.
A sale rung up while the register was offline always goes through, because it already happened. If it had to come out of back stock, its stock record says so.
Managing locations
Admins manage the store's locations with the Product Locations button at the top of the Products page. There is exactly one Sales Floor — the location the register sells from; everything else is back stock.
- The Sales Floor can't be deleted.
- A location that still holds stock can't be deleted — the message says how many products are still on it. Move that stock to another location first.
- A location that is empty but has stock history is switched off rather than deleted, so its history stays readable.
More detail: every register tool (adjust, count, reweigh, move)
At the Register
The Stock Adjustment screen
Open the register's Settings menu and, under Quick Actions, tap Stock Adjustment.
- Search for a product by name or SKU, or scan its barcode.
- Pick an adjustment type (see the table below).
- Pick the location if your store splits stock. The buttons show how much is at each location. The heading changes to match what you are doing: Put on, Take from, or Counted at. Receive starts on Back Stock and everything else starts on the Sales Floor, so change it if the stock went somewhere else.
- Enter the quantity. The preview shows the stock before, the stock after, and the change.
- On a Receive, check the cost. A Cost per unit box appears for Receive only. It starts on the last cost paid for that product ("Last paid $5.00. Change it if this delivery cost something else."), or is empty with "No cost on file yet — enter what you paid." Whatever is in it is averaged with the stock already on hand and becomes the product's cost.
- Optionally add a Reason.
- Tap Adjust Stock. For an Inventory count, the button says Record Count.
| Type | What you enter | Effect |
|---|---|---|
| Receive | How many arrived | Adds stock. |
| Inventory | How many are physically there | Brother POS works out the difference. |
| Count Correction | The difference, e.g. -2 or 3 | Adds or removes that amount. |
| Spoilage | How many spoiled | Removes stock. |
| Damage | How many were damaged | Removes stock. |
| Reweigh | The difference | Adds or removes that amount. |
| Moisture Loss | How much weight was lost | Removes stock. |
Inventory (a stocktake)
Use Inventory when you have just counted something. Enter what is on the shelf, not what to add or remove.
- Zero is a real count. It means the shelf is empty.
- A count that matches still gets recorded. The preview says Counted — no variance. The history then shows someone checked on that date and the number was right.
- The difference is worked out when you save, using the stock at that moment. If something sells while you are counting, the count is still measured correctly.
- On a store that splits stock, the count applies to the location you pick under Counted at. The difference is taken from, or added to, that location only.
There is no cost box on a count, a spoilage or a damage. Those leave the product's cost exactly as it was — the only thing that changes what your stock is worth is stock arriving at a price.
Batch mode
Batch mode is on by default. After each adjustment, the form clears and you can go straight to the next product. The adjustments from this session are listed at the bottom. The cost you typed stays put as you move on to the next product, so change it when the next item cost something else.
Starting from a product
Tap a product on the register grid to open its details, then tap Stock Adjustment. The screen opens with that product already chosen, so there is no need to search for it again. The button isn't shown on bundles or combos — their stock comes from their components, so there is nothing to adjust on the bundle itself.
Seeing a product's history at the register
Once a product is chosen, an Adjustment history button appears. Tap it for that product's recorded movements, newest first:
- What kind of change it was, when it happened, and who made it.
- The location and the reason, where there is one.
- The change and the stock it left behind, for example +12 → 42.
Tap Hide history to close it again. A product with nothing recorded says "No recorded adjustments for this product yet." If the register can't reach the server, it says "Could not load the history."
Reweighing a container
Use Reweigh (called Shake / Reweigh on cannabis stores) to weigh what is left in a jar or bin. Brother POS works out how much went missing. It is under Quick Actions in the register's Settings menu, or on the second tab of the Stock Adjustment screen. Like other stock adjustments at the till, it needs Adjust Stock at the Register (or Adjust Stock). Approving someone else's reweigh with a PIN is different: the approver's role must hold Adjust Stock.
- Search for the product, or scan it.
- Under What does it weigh now?, enter the weight. If a scale is connected, tap Use …g to fill in the live reading.
- Check the breakdown: System says, Counted, and the Variance.
- If weight is missing, it is all recorded as shake (Trim / waste on other stores) unless you tap Split it. Splitting divides it between shake, Moisture Loss and Unaccounted, and the split must add up to the missing amount.
- If your store has a product set up to receive shake, you can tick Send … to that product to add the weight to it.
- Tap Record Reweigh.
Weights are shown in the product's own unit, such as g, oz, lb or kg. A bulk-by-weight product shows grams. The product's new stock appears on the register grid straight away, so there's no need to sync. If the container weighs more than expected, the difference is recorded as a count correction.
On a store that splits stock by location, the jar on the scale is compared with what the Sales Floor holds — not the whole store — and only the Sales Floor changes. An 18.5 g jar weighed against 20 g on the floor records 1.5 g missing, however much is sitting in the vault.
Moving stock between locations
The Stock Adjustment screen changes how much stock you have, not where it sits. To move stock that is already counted, tap the product at the register to open its details and use the Inventory by location section — see Moving stock at the register. You can also do it from the product's Inventory tab in the admin panel — see On the product page.
The Stock Adjustment screen needs a network connection and cannot be used while offline.
Counting one location from the product details
On stores that split stock, tap a product at the register to open its details. The Inventory by location section lists each location and how much is there.
- Tap Count next to the location you counted.
- Enter the number under How many are actually here? The box starts with what the system currently shows.
- As you type, it tells you the difference, e.g. 5 fewer than the system says. or Matches the system — nothing will change. Check this before saving, because typing 5 when you meant 50 is an easy mistake.
- Tap Save. Only that location changes.
The Count button does not appear on bundles or combos. Their stock comes from their components, so count the components instead.
A count has to be checked against live stock, so it cannot be saved for later. If the locations cannot load (for example, you are offline), the section says counting is unavailable. You can still move back stock to the floor, and those moves sync when you are back online.
Moving stock at the register
The same Inventory by location section moves stock between shelves, so you don't have to go to the admin panel to bring stock forward. The move tools appear for roles with Adjust Stock at the Register (or Adjust Stock). Without either, the section still shows where stock sits — seeing it is harmless, moving it is what needs the permission.
To move a set amount:
- Tap the product at the register to open its details.
- Under Move stock, choose a From location. Only locations holding stock are listed, with how much is there.
- Choose a To location and enter the quantity.
- Tap Move and confirm — the question names the amount, the product and both shelves, e.g. Move 10 of House Flower from Back Stock to Sales Floor?
If the quantity is more than that shelf holds, the form says Enter a quantity between 1 and 40. rather than letting the move through.
To bring everything forward: tap Move all back stock to floor, then confirm. This appears whenever there is back stock to move.
The location marked sellable is your Sales Floor — that is the stock the register can sell.
Unlike counting, a move can be made without a connection. You'll see Move queued — will sync when back online, and the product's floor and back numbers update on the register straight away.
More detail: back office — Products list, product page, check in/out, bulk
In the Back Office
Quick stock edit on the Products list
On Products, click the pencil next to a product's stock number. This is available on products without variations, and not on bundles (their stock comes from their components).
- Enter the new number.
- If your store splits stock, choose what the number describes from the dropdown. Each location shows its current quantity.
- A location (e.g.
Sales Floor (53)) means "this location holds this many." The difference is recorded against that location. - Total means the whole product. It is only offered while the product's stock sits in one place.
- A location (e.g.
- Click Save.
On stores that split stock, the Products list shows the split next to the stock number, e.g. (Sales Floor 53 · Back stock 37), so you can see which shelf you are correcting. A product whose stock is all in the back shows a Back stock only badge: the register can't sell it until you move some to the floor.
On the product page
Open a product and go to the Inventory tab.
- Stock in one place: change Current Stock and save the product. Only a change you type is applied: if you leave the box alone, saving the product doesn't touch stock, and if you change it, the difference is added to or taken from the stock as it is now — so anything sold while the page was open isn't undone.
- Stock in more than one place: under Inventory by location, type the number you counted into the Counted box beside the location and click Set. The page confirms, e.g. "Back Stock set to 40." If the number already matches, nothing changes.
- Products with variations: each variation has its own stock. The parent shows Total Stock (All Variations).
- Bundles: stock is worked out from the components and cannot be counted directly.
The same section has Move to floor, which brings back stock forward in one tap (leave the quantity blank to move all of it). Below it, the Move stock panel moves stock between any two locations: pick From and To (each location shows what it holds), enter a Quantity and click Move. It starts on moving from the back room to the sales floor.
Checking stock in and out
The Inventory tab also has a Check in / check out panel. Use it to record a delivery with the price you paid for it, or to take stock out with a reason. The forms need the Adjust Stock permission, like the other back-office stock screens.
Three figures sit across the top:
| Figure | What it shows |
|---|---|
| On hand | How much you have, in the product's own unit — units, grams, and so on. |
| Cost per unit | What one of them costs you. It reads Not set until a cost has been entered, and follows the product's unit, so a weighed product says Cost per gram. |
| Value at cost | On hand × cost per unit. |
On a store that splits stock by location, a table underneath lists each location holding any, with its quantity and its value at cost.
Check in
| Field | What to enter |
|---|---|
| Quantity | How much arrived. |
| Paid per unit ($) | What one unit cost you. Leave it blank to keep the current cost. |
| Into | Where it went. Each location is listed with what it holds now. It starts on where deliveries usually land: the back room, or the sales floor if there's no back room. Only on stores that split stock. |
| Note (supplier, invoice #…) | Anything you want kept with the movement. |
A cost you enter is averaged with the stock already on hand and becomes the product's cost from then on. Say you have 10 on the shelf that cost $5 each and you check in 10 more at $7: the cost per unit becomes $6. If the product never had a cost, what you enter simply becomes the cost.
Check out
| Field | What to enter |
|---|---|
| Quantity | How much is leaving. |
| Reason | Damaged, Expired / spoiled, Returned to supplier, Store use / sample, Lost / stolen or Other. |
| From | Where it came off. It starts on the sales floor when the floor holds some, otherwise on the location holding the most. Only on stores that split stock. |
| Note | Required when the reason is Other. |
Checking out never changes the cost. It records what the stock was worth at the cost on file when it left, so write-offs can be added up in money as well as in units.
The movement history
Recent check-ins and check-outs lists the last ten of these movements with When, What (the reason, and the location where there is one), Quantity, Cost per unit, Value and By. Anyone who can open the product can read it; only people with Adjust Stock see the check in and check out forms above it.
The panel isn't shown on bundles, or on a product that has variations. A bundle's stock comes from its components, and a variable product's stock lives on its variations — check those in and out instead.
Quantities and costs have to be plain numbers, so a slip of the keyboard is refused rather than recorded as a free delivery. A quantity must be greater than zero, and you can't check more out of a location than it holds — the message names what is actually there.
Bulk stock adjustments
Go to Products → More Actions → Bulk Operations (the menu item is shown to admins; managers can also use the page), select the products, and open the Stock tab.
| Field | What it does |
|---|---|
| Operation | Set to quantity, Add quantity, or Subtract quantity. |
| Quantity | The amount. |
| Reason | Required. It is saved with every adjustment. |
| Location | Shown on stores that split stock. Leave it on Let the operation decide to use the rules above, or pick a location. |
Click Adjust stock. The confirmation names the operation, the quantity, how many products it affects and, if you picked one, the location.
- Set to quantity with a location means each product has that many at that location.
- Set to quantity without a location is skipped for any product whose stock is split across locations. The result tells you how many were skipped, so pick a location and run it again for those.
- Subtract quantity never takes a product below zero, and leaves a product already below zero as it is.
- Bundles and products with variations are always skipped, because their stock comes from their components or variations. Select the variations themselves instead.
More detail: how adjustments show in the history
How Adjustments Appear in the History
| Where it was made | Recorded as |
|---|---|
| Register — the type you picked | That type (Receive, Inventory, Count Correction, Spoilage, Damage, Reweigh, Moisture Loss). |
| Register — Reweigh tab | Missing weight as Shake, Moisture Loss or Unaccounted (however you split it). A container that weighs more than expected is recorded as Count Correction. |
| Register or product page — Count on a location | Inventory, with the reason "Counted at location". |
| Product page — Check in | Receive, with the cost you entered kept against it. |
| Product page — Check out | Damage for Damaged, Spoilage for Expired / spoiled, and Checked Out for the other reasons. The reason you picked is kept with it. |
| Products list quick edit | Receive if stock went up, Count if it went down. |
| Bulk — Set / Add / Subtract | Count / Receive / Spoilage. |
| Product issue | Damage for a damaged product that was refunded, or for any courtesy replacement; otherwise Spoilage. |
Each change is recorded once, with:
- When it happened and who made it.
- The product or variation.
- The stock before and after, and the change.
- The type and the reason or notes.
- The location, when one applied.
- The cost, when one was recorded with it — a check-in, a Receive at the register with a cost, or a purchase order receipt. It shows under Cost per unit and Value in the product's Check in / check out panel.
Records cannot be edited or deleted. Review them in Reports → Inventory, on the Movement tab, which lists stock adjustments with date filtering.
For cannabis products, stock adjustments feed the compliance reports sent to regulators (e.g. SLGA in Saskatchewan). Pick the type that matches what really happened, and add a reason.
More detail: troubleshooting and best practices
Troubleshooting
| Problem | Cause and fix |
|---|---|
| I can't see Stock Adjustment at the register. | Your role does not have Adjust Stock at the Register. Ask an admin to tick it, and allow up to an hour for it to reach the till. |
| The pencil or Set doesn't change the stock. | You may not have the Adjust Stock permission. Those stock changes are refused without it. |
| The stock field on the product page is greyed out. | The product's stock is split across locations. Type the counted number into a location's Counted box under Inventory by location and click Set. |
| A bulk "Set to quantity" skipped some products. | Those products have stock in more than one location. Run it again with a Location picked. |
| There's no Count button at the register. | The product is a bundle, you don't have Adjust Stock at the Register, or the locations could not load because you are offline. |
| The register says "Not on the sales floor". | The Sales Floor doesn't hold enough, but back stock does. Tap Move … to floor to bring out just what's needed, or move stock forward first. |
| I can't delete a location. | It is the Sales Floor, or it still holds stock. Move the stock to another location first. |
| I counted the floor but the back stock changed. | Check the location under Counted at before saving. Received stock defaults to Back Stock and everything else to the Sales Floor. |
| There's no Check in / check out panel on the product. | The product is a bundle, or it has variations. Check the components or the individual variations in and out instead. |
| I checked stock in but the cost didn't change. | Paid per unit was left blank, which deliberately keeps the existing cost. Enter what you paid and check in again. |
| The check-in was refused. | Quantities and costs have to be plain numbers, like 12 or 4.50, and the quantity must be above zero. The message says which box to fix. |
| The check-out says the location only holds so much. | You are taking more out of that location than it has. Reduce the quantity, or pick the location the stock is really on under From. |
| There's no Cost per unit box at the register. | It only appears on a Receive. Counts and write-offs don't change what stock is worth. |
| I can see where stock sits but there are no Move buttons. | Your role does not have Adjust Stock at the Register or Adjust Stock. Ask an admin to tick one, and allow up to an hour for it to reach the till. |
| A register shows "Pending stock moves" that never clears. | Only affects stores that took the stock permission away from clerks, on moves made offline before the September 2026 update. Nothing was lost — those moves were refused, so the stock never moved on the server either. The count clears itself; newer refusals are dropped straight away. |
Best Practices
- Count one location at a time. On a split store, count the Sales Floor and the Back Stock separately rather than typing a new total.
- Use Inventory, not Count Correction, when you have just counted. Enter what you see and let Brother POS work out the difference.
- Count from paper when it helps. A printed count sheet — expected stock by category with a box to tick — can be printed at any time from the register (Print Count Sheet under Quick Actions in its Settings) when your store has the count sheet turned on and your role can manage cash sessions, and Products → More Actions → Inventory List (Print) prints the whole stock list from the back office. See Daily Close and CSV Export.
- Say where stock went. When receiving or writing off, choose the location rather than relying on the default.
- Investigate big differences. Large or repeated differences can point to theft, receiving mistakes or mis-rung sales. Don't just correct them and move on.
- Use purchase orders for supplier deliveries. They keep a proper record of what was ordered and received. See Purchase Orders.
What's Next?
- Purchase Orders — Receive new inventory from suppliers.
- Scan to Receive — Fast barcode-driven receiving.
- Stock Transfers — Move stock between stores.
- Low Stock Alerts — Get notified when stock runs low.
- Inventory — What your stock is worth, and every movement in a date range.
- Bulk Operations — Other changes across many products.
- Roles and Permissions — Control who can adjust stock.