Customer Management
The admin panel provides a full-featured customer management interface where you can view your complete customer list, search and filter accounts, edit customer details, review purchase histories, and generate customer codes. This page covers all customer management tasks available from the admin panel.
Accessing Customer Management
- Log in to the Admin Panel at
yourstore.brotherpos.ca. - Navigate to Customers in the navigation bar.
- You will see the Customer List -- a paginated table of all customer accounts in your store.
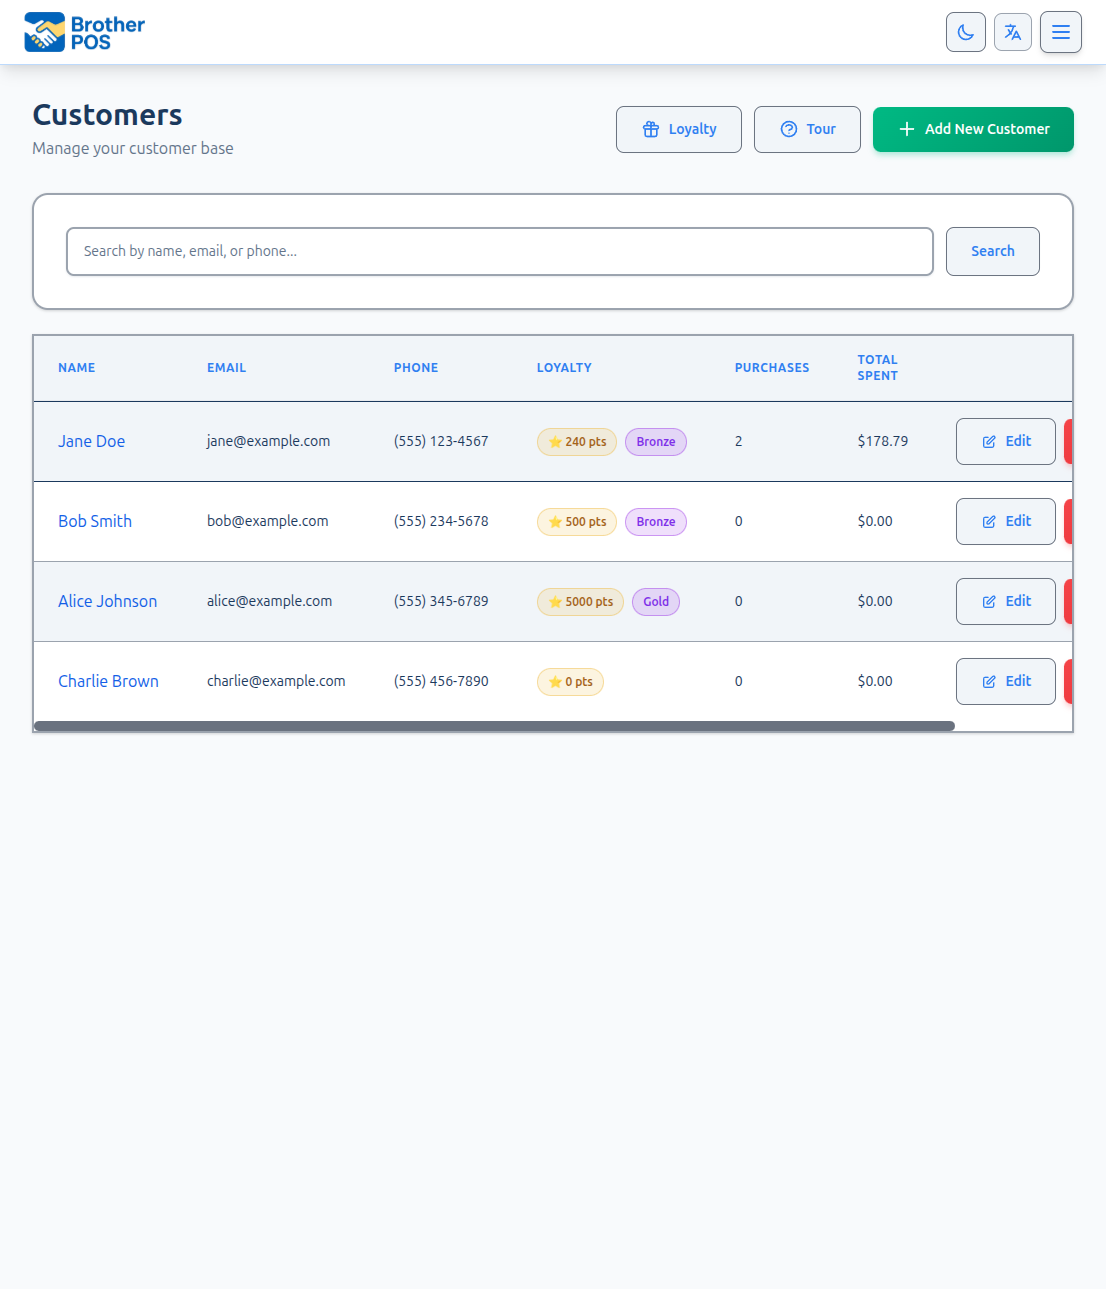
The Customer List
The customer list displays all registered customers, sorted by most recently created. Each row shows:
| Column | Description |
|---|---|
| Name | Customer's full name (or auto-generated name like "Customer C10015") |
| Email address on file | |
| Phone | Phone number on file |
| Loyalty | Current points balance and tier badge (only shown when loyalty is enabled in store settings) |
| Purchases | Total number of completed transactions |
| Total Spent | Total amount spent across all completed sales |
| Actions | Edit and Delete buttons for managing the customer |
The list is paginated with 25 customers per page. Use the page navigation at the bottom to browse through large customer lists.
Searching and Filtering
Search
Use the search bar at the top of the customer list to find specific customers. The search checks across multiple fields simultaneously:
- Name -- Partial and case-insensitive matching
- Email -- Partial matching
- Phone -- Partial matching (ignores formatting)
- Customer Code -- Exact or partial matching
- Loyalty Card Number -- Exact or partial matching
Examples:
- Searching
306finds all customers with "306" in their phone number - Searching
goldwould match customers named "Goldman" (it searches names, not tiers) - Searching
C100finds all customers with codes starting with C100
If a customer presents a loyalty card or you have their code, type the full customer code (e.g., C10015) for an instant exact match.
Viewing a Customer Profile
Click on any customer in the list to open their profile page. The profile is read-only -- you must click Edit to modify any information.
Customer Details
- Name, phone, email -- Contact information (read-only on the show page)
- Customer code -- Their unique
C#####identifier - Loyalty card number -- Physical card number (if assigned)
- Created date -- When the account was first created
Loyalty Information
- Current points balance -- How many points the customer has available
- Loyalty tier -- Their current tier with color badge
- Lifetime spend -- Total revenue from this customer
- Visit count -- Total number of completed sales
Purchase History
The profile shows the customer's recent completed sales in a table with the following columns (in order):
| Column | Description |
|---|---|
| Receipt Number | Clickable link to the full sale record |
| Date | When the sale was completed |
| Items | Number of items in the sale |
| Total | Sale amount |
| Payment | Payment method used |
| Cashier | Who processed the sale |
This is useful for resolving customer inquiries ("What did I buy last Tuesday?") or verifying return requests.
Editing a Customer
Step-by-Step
-
Navigate to Customers in the admin panel.
-
Find and click on the customer you want to edit.
-
Click the Edit button.
-
Update any of the following fields:
Field Notes Name The customer's display name. Can be changed at any time. Phone Accepts various formats. Stored as-is but displayed formatted. Email Must be a valid email format if provided. Loyalty Card Number Must be unique across all customers in your store. -
Click Save to apply changes.
Customer code, loyalty points, loyalty tier, lifetime spend, and visit count cannot be manually changed from the edit form. Tier changes happen automatically based on spending thresholds.
Creating a Customer from the Admin Panel
While customers are typically created at the POS during a sale (see Creating Customers), you can also create them from the admin panel:
- Navigate to Customers.
- Click New Customer (or the "+" button).
- Fill in the customer details:
- Name (optional -- auto-generates if blank)
- Phone (optional)
- Email (optional)
- Loyalty Card Number (optional)
- Click Create Customer.
A unique customer code is automatically generated. The customer starts with 0 loyalty points, $0 lifetime spend, and 0 visits.
Customer Codes
Every customer has a unique code in the format C##### (e.g., C10001, C10002, etc.). These codes are:
- Auto-generated when the customer account is created
- Sequential -- each new customer gets the next available number
- Permanent -- codes cannot be changed or reassigned
- Scannable -- can be printed as barcode labels for fast POS lookup
Generating a Code for an Existing Customer
If a customer was created before the code system was implemented and does not have a code:
- Open the customer's profile.
- Click Generate Code.
- A code is assigned and saved immediately.
Printing a Loyalty Card Label
From the customer's profile:
- Click Print Card.
- A barcode label is sent to your configured label printer.
- The label includes the customer's code as a scannable barcode and their name.
The Print Card feature requires a label printer configured per-register on the Registers page (accessible from Settings or Cash Drawers). If no label printer is set up for the register you're printing from, the print button will not function.
Bulk Code Generation
If you have many customers without codes (e.g., after migrating from another system), contact your system administrator. A bulk code generation utility exists for backfilling codes across all customer records.
Deleting a Customer
To delete a customer account:
- On the customer list page, find the customer you want to delete.
- Click the Delete button in the Actions column.
- Confirm the deletion.
Note: The Delete button is on the customer list page, not the customer profile page.
Deleting a customer removes their account and all associated data, including loyalty points, loyalty transaction history, and store credits. Sales that were associated with the deleted customer will have their customer reference removed but the sale records themselves are preserved. Consider whether editing the customer or deactivating their account might be more appropriate.
Common Tasks
Merging Duplicate Customers
Brother POS does not currently have an automatic merge feature. If you discover duplicate accounts for the same customer:
- Identify which account should be the "primary" (usually the one with more purchase history).
- Note the loyalty points and store credit balances on the duplicate account.
- Contact Brother POS support to have the duplicate account's points transferred to the primary account.
- Transfer any store credit information if needed.
- Delete the duplicate account.
Exporting Customer Data
Customer data can be viewed and managed through the admin interface. For bulk data needs, consult with your system administrator about export options.
Viewing All Customers in a Specific Tier
Use the loyalty tier information displayed in the customer list to identify customers by tier. You can visually scan the Loyalty Tier column or search for customers and check their tier individually.
Audit Trail
Brother POS maintains an audit trail for customer records. Every change to a customer account is tracked, including:
- Who made the change
- When the change was made
- What fields were modified (before and after values)
This is accessible to admins through the Activity Logs in the admin panel. See Activity Logs for details.
Best Practices
- Keep information current. If a customer reports a new phone number or email, update their record immediately. Accurate contact information makes future lookups faster.
- Encourage customer codes. Print loyalty card labels for regular customers so they can be scanned quickly at the POS instead of searched by name.
- Review purchase history for returns. Before processing a return, check the customer's purchase history to verify the original transaction.
- Watch for duplicates. Periodically scan the customer list for potential duplicates (same phone number, similar names). Merge them proactively to keep data clean.
- Do not delete unless necessary. Deleting a customer removes valuable historical data. Prefer editing or deactivating over deletion.
What's Next?
- Loyalty Setup -- Enable and configure the loyalty points program.
- Loyalty Tiers -- Set up tier thresholds, multipliers, and discounts.
- Rewards -- Create rewards customers can redeem with their points.
- Store Credits Admin -- Issue, manage, and void store credits.
- Customer Analytics -- Reports on customer spending and behavior.