Loyalty Program Setup
Use this page to switch on the loyalty program, choose how many points customers earn, and set what a point is worth.
Quick steps
- Go to Settings > Edit Settings and stay on the General tab.
- Find Loyalty Program Settings and tick Enable Loyalty Program.
- Set Points Per Dollar Spent (1 means one point for every $1 spent before tax).
- Set Cash value per point ($) — for example 0.01 means each point is worth one cent.
- Click Update Settings. Customers now earn points on every completed sale that has a customer on it.
- Next, add tiers and rewards so customers have something to work toward.
Common questions
A customer forgot to give their name at the sale. Can I add the points? Yes. Open the customer, click Edit, change Loyalty Points and click Update Customer. Or tap Adjust Points on their details at the register (a reason is required there).
Do customers earn points on tax? No. Points are worked out on the price after discounts, before tax.
If I turn loyalty off, do customers lose their points? No. Points and tiers are kept, and come back if you turn it on again.
What happens to points when an item is returned? The points earned on the returned items are taken back automatically, in proportion.
Can I stop some products from earning points? Yes. Go to Products, click Categories, edit the category and untick Loyalty Eligible.
More detail: how the loyalty program fits together
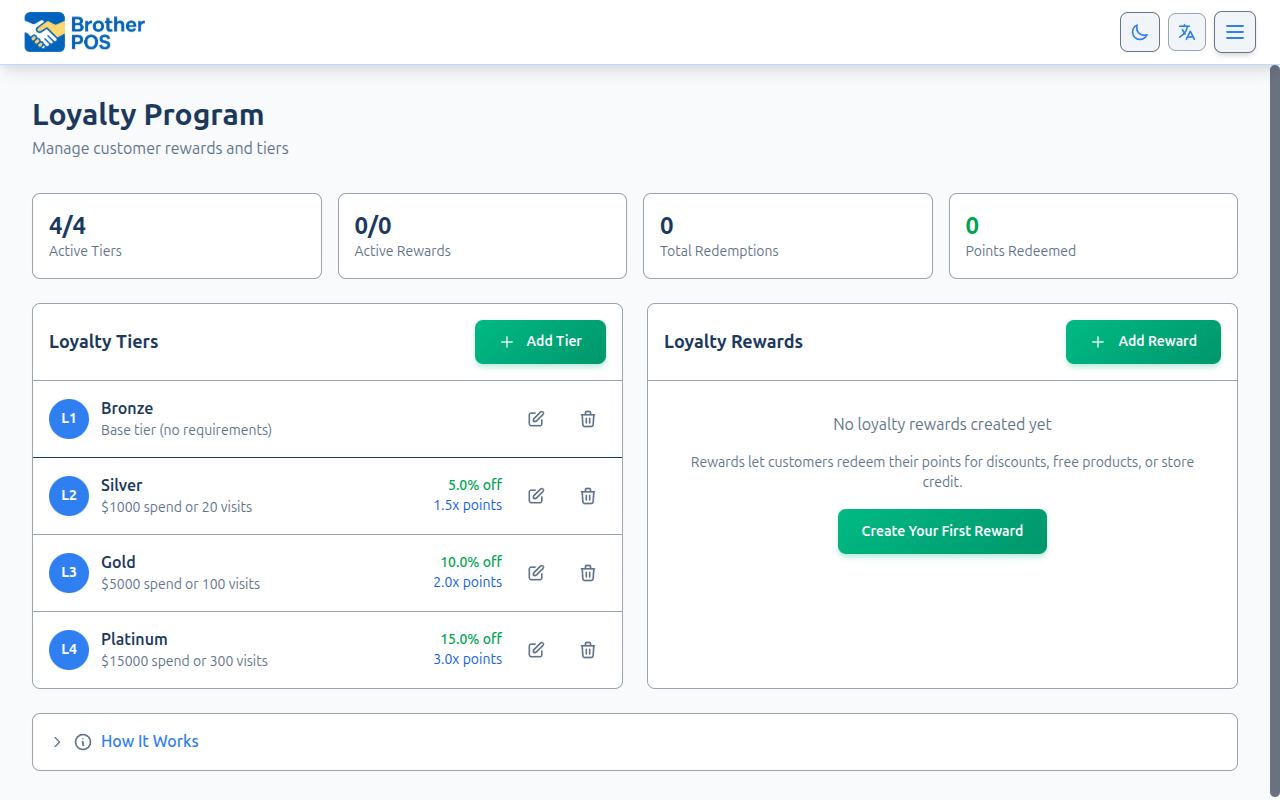
Brother POS includes a built-in loyalty program that lets customers earn points on every purchase and redeem them for rewards. This page covers how to enable the program, configure the earning rate, and understand how points and redemptions flow through the system.
Overview
The loyalty program has four main components:
- Points earning — Customers earn points based on how much they spend. You control the rate.
- Tiers — Customers move up through tiers (e.g., Bronze, Silver, Gold, Platinum) as their lifetime spend or visit count grows, unlocking better earning rates and discounts. See Loyalty Tiers.
- Rewards — You configure rewards that customers can redeem using their points (discounts, free products, store credit). See Rewards.
- Redemption — Cashiers redeem rewards at the POS during checkout, or cash out any number of points for their dollar value. See Loyalty Points & Tiers (POS).
More detail: turning loyalty on or off, and shared stores
Enabling the Loyalty Program
Step-by-Step
- Log in to the Admin Panel at
yourstore.brotherpos.ca. - Navigate to Settings > Edit Settings > General tab.
- Find the Loyalty Program Settings section.
- Check Enable Loyalty Program.
- Click Update Settings.
When loyalty is enabled:
- Customers earn points on every completed sale where a customer account is attached.
- Each sale adds to the customer's lifetime spend and visit count, which is what moves them up through tiers.
- The Loyalty column, the Loyalty Program card on customer profiles, and the Loyalty button on the Customers page appear in the admin panel.
When loyalty is disabled:
- No points are earned on new sales.
- The register gives no tier discounts, and customers can't redeem rewards or cash out points.
- New sales still add to each customer's lifetime spend and visit count, so that history is up to date if you turn loyalty back on.
- The loyalty column, profile card and Loyalty button are hidden in the admin panel.
- Existing customer points and tiers are kept.
Turning off the loyalty program does not delete any customer points or tier assignments. If you re-enable the program later, all accumulated points and tiers are still there.
If Your Stores Share Customers
If you own several stores and they share customers, they run one loyalty program. Enable Loyalty Program, Points Per Dollar Spent and Cash value per point are the same at every sharing store, and so are the tiers and rewards. Change any of them at one store and it changes at all of them straight away. The Loyalty Program Settings section and the loyalty pages show a note: "This store shares its loyalty program with [stores] — changes here apply there too."
Customers have one points balance across those stores, so points earned at one can be spent at another. See Sharing customers across your stores for how sharing is turned on and what happens to points when a store stops sharing.
More detail: the points rate and what a point is worth
Configuring the Points Rate
The Points Per Dollar Spent rate determines how many loyalty points a customer earns for each dollar they spend. It starts at 1.0.
Setting the Rate
-
In Settings > Edit Settings > General tab, find the Points Per Dollar Spent field.
-
Enter the desired rate. Common configurations:
Rate Meaning Example ($50 sale) 1.0 1 point per $1 spent 50 points earned 2.0 2 points per $1 spent 100 points earned 0.5 1 point per $2 spent 25 points earned 10.0 10 points per $1 spent 500 points earned -
Click Update Settings.
Points are worked out per line item from the line's total after line discounts (before tax), including any bonus-points campaign on that item. If the whole order also has a discount (an order discount, a tier discount, a reward, points cashed out, and so on), the points shrink by the same share. Finally the tier multiplier is applied:
Points Earned = Sum(line total x Points Per Dollar x campaign multiplier) x (share of the order left after order discounts) x Tier Multiplier
The result is rounded to the nearest whole number.
A rate of 1.0 (1 point per dollar) is the simplest and most intuitive for customers. If you want rewards to feel more attainable, use a higher rate like 10.0 — earning "500 points" feels more rewarding than "50 points" even if the underlying value is the same. Just adjust your reward costs accordingly.
Setting What a Point Is Worth
Right beside the points rate is Cash value per point ($) — how many dollars one point is worth when a customer spends it. It starts at $0.01 (one cent per point).
- Go to Settings > Edit Settings > General tab, Loyalty Program Settings section.
- Enter the value in the Cash value per point ($) field.
- Click Update Settings.
This one number does two jobs:
- It tells your staff what a balance is worth. The dollar figure appears under the points balance in the customer's details at the register, and beside the balance on the customer's page in the admin — for example,
430 pts (≈ $8.60). No more mental arithmetic when a customer asks "what have I got saved up?" - It prices the points cash-out at the register. A cashier can let a customer put any number of points toward the bill, and this value is what converts those points into dollars off. See Loyalty Points & Tiers (POS).
Worked Examples
| Points rate | Cash value per point | What the customer gets back |
|---|---|---|
| 1 pt per $1 | $0.01 | $1 back for every $100 spent |
| 1 pt per $1 | $0.02 | $2 back for every $100 spent |
| 10 pts per $1 | $0.002 | $2 back for every $100 spent |
The dollar figure beside a balance is useful on its own — it is the fastest way for a clerk to answer "how much is that worth?" without opening the rewards list.
More detail: how points are earned
How Points Are Earned
Points are earned automatically when all of the following conditions are met:
- Loyalty is enabled in store settings.
- A customer account is attached to the sale.
- The sale is completed (payment fully processed).
The Earning Flow
- Cashier attaches a customer to the sale at the POS.
- Cashier completes the sale (processes payment).
- The sale is added to the customer's lifetime spend and visit count.
- Brother POS calculates the points (see the formula above) and applies the tier multiplier.
- Points are added to the customer's balance.
- A loyalty transaction record is created (type: "earn") with the before/after balance.
- If the customer now meets a higher tier's requirement, their tier is upgraded automatically.
What Affects Point Calculations
| Factor | Effect |
|---|---|
| Sale total | Higher totals earn more points |
| Points per dollar rate | Set by admin in store settings |
| Tier multiplier | Higher tiers earn points faster (e.g., Gold = 1.5x). A tier that has been switched off gives no multiplier. |
| Discounts | Points are calculated on the discounted total, not the pre-discount amount |
| Tax | Points are calculated on line item totals, which are pre-tax (after discounts). Tax is NOT included in points calculations. |
| Payment method | No effect — all payment methods earn the same points |
| Manual/custom items | Ad-hoc items keyed in with a custom name and price earn points on their amount, just like catalog products, and get the customer's tier multiplier. A bonus-points campaign set to all products applies to them too — a Wednesday double-points promotion doubles the points on a $45 bar tab keyed in by hand. Campaigns aimed at particular products, categories or brands do not apply, because a manual item has no product to match against. Manual items also skip the category eligibility check. |
| Payouts | Payout lines never earn points. |
| Points cashed out | If the customer puts points toward the bill, that discount reduces the points earned on the sale in the same proportion as any other discount. |
| Category eligibility | Catalog products only earn points if their category is loyalty-eligible (see below). Manual items are not subject to this. |
| Returns/voids | Voiding a completed sale takes back the points it earned and gives back any points it spent. Voiding a single line off a completed sale takes back that line's share. Returns automatically deduct loyalty points proportionally (see note below). |
When a return is processed, the points earned on the returned items are clawed back proportionally. Brother POS looks at the actual "earn" transaction from the original sale and prorates it against the portion of the sale being returned (the loyalty-eligible catalog items plus any manual/custom items). Because it works from the recorded earn, any tier multiplier or campaign bonus that boosted the original points is reversed in the same proportion. If the original sale had no earn transaction (for example, loyalty was disabled at the time), nothing is deducted. The deduction never reduces a customer's balance below zero.
Voiding one line works the same way. Say a $100 item and a $20 item earned 240 points during a double-points campaign. Voiding the $100 line takes back 200 of those points, and the customer keeps 40.
More detail: loyalty history and adjusting points by hand
Loyalty Transaction History
Points earned at a sale, points redeemed, points adjusted at the register, and points reversed by returns and voids each create a loyalty transaction record.
Transaction Types
| Type | Description |
|---|---|
| Earn | Points added from a completed sale |
| Redeem | Points spent at checkout — either on a reward, or cashed out for a dollar discount. A cash-out reads like "Cashed out 300 points for $6.00 off". |
| Adjustment | A points adjustment made at the register or on the admin edit form, or points taken back or given back by a return or void |
Each transaction records:
- Transaction type
- Points change (positive for earn/add, negative for redeem/deduct)
- Points balance before and after
- Associated sale (if applicable)
- Description text
- Timestamp
Viewing Transaction History
Open a customer's profile in the admin panel. The Loyalty Transaction History table shows their 20 most recent transactions with the date, type, points, balance and description.
To download every loyalty transaction, go to Customers, click Loyalty, then click Export Transactions (CSV).
Manual Points Adjustments
You can change a customer's loyalty points balance from two places:
From the Admin Panel
- Navigate to Customers, open the customer's profile, and click Edit.
- The Loyalty Points box holds the customer's balance as it was when you opened the form. Change it to the new balance.
- If your store has set a cash value per point, a Cash Value box sits beside it. Type a dollar amount there and the points fill in for you. For example, at 100 points to the dollar, typing $5.00 enters 500 points. Typing in the points box fills in the dollar value the same way.
- Click Update Customer.
Only the points are saved; the Cash Value box is a calculator. It doesn't appear if your store hasn't set a cash value per point (see Setting What a Point Is Worth).
Brother POS saves the difference between the number the form showed and the number you typed, and records it in the customer's Loyalty Transaction History as an Adjustment reading "Adjusted in the back office". So if the customer earned 40 points at the register while you had the form open, and you added 100, they end up with both. Saving the form without touching the points leaves the balance alone. If you want your own reason in the loyalty history, adjust points from the register instead.
From the POS Register
- Search for and select the customer at the POS.
- Tap their name to open Customer Details.
- In the loyalty section, tap Adjust Points, enter the points to add or remove and a reason (the reason is required), and confirm.
The Adjust Points button only appears for staff whose role has permission to manage loyalty.
Common Use Cases
- Correcting errors (e.g., points not earned due to forgotten customer attachment)
- Compensating for service issues
- Promotional point bonuses
A customer's balance can't go below zero. At the register, an adjustment that would take the balance below zero is rejected with an error. To zero out a balance, deduct exactly the number of points they currently have.
More detail: categories that don't earn points, and WooCommerce
Category-Level Loyalty Settings
Individual product categories can be configured to be loyalty eligible or not. By default, all categories are eligible.
If a category is marked as not loyalty eligible:
- Products in that category still appear in the sale and are charged normally.
- Those products don't earn loyalty points.
- A customer's automatic tier discount doesn't apply to them either.
- Sub-categories of an ineligible category are ineligible too, whatever their own setting says.
- A product in several categories earns points if at least one of its categories is eligible.
This is useful for categories like "Gift Cards" or "Accessories" where you may not want to award loyalty points.
To configure category loyalty eligibility:
- Go to Products and click Categories.
- Edit the category.
- Check or uncheck Loyalty Eligible.
- Save.
Integration with WooCommerce
If your store uses the WooCommerce integration, Brother POS sends loyalty information to your online store: your tier setup, and the points and tier of customers who are linked to a WooCommerce account.
This integration is configured separately. See your WooCommerce integration settings for details.
More detail: recommended setup and best practices
Recommended Configuration
Here is a typical starting configuration for a new loyalty program:
| Setting | Recommended Value | Rationale |
|---|---|---|
| Enable Loyalty Program | On | Enable from day one to start building customer loyalty |
| Points Per Dollar Spent | 1.0 | Simple and intuitive for customers and staff |
| Cash value per point | 0.01 | 1 point = 1 cent, so a balance reads as "$1 back per $100 spent" |
| Bronze tier | Level 0, $0 minimum, 1.0x multiplier, 0% discount | Base tier for all new customers |
| Silver tier | Level 1, $500 minimum, 1.25x multiplier, 2% discount | Achievable within a few months for regular customers |
| Gold tier | Level 2, $1,500 minimum, 1.5x multiplier, 5% discount | Meaningful reward for loyal customers |
| Platinum tier | Level 3, $5,000 minimum, 2.0x multiplier, 10% discount | Top tier for your best customers |
Pair this with rewards at various point thresholds (see Rewards) so customers have something to work toward.
Best Practices
- Enable loyalty from the start. Even if you have not configured tiers or rewards yet, enabling loyalty means customers start accumulating points immediately. You can add tiers and rewards later.
- Communicate the program to customers. Post the points rate and reward options near the register so customers know what they are earning.
- Keep the points rate simple. A rate of 1 point per dollar is easiest for everyone to understand.
- Review the program quarterly. Check how many customers are redeeming rewards and whether the program is driving repeat visits. Adjust thresholds and rewards as needed.
- Train your cashiers. Make sure all cashiers know to ask customers if they have a loyalty account before completing a sale. Missed loyalty attachments mean unhappy customers.
What's Next?
- Loyalty Tiers — Configure tier thresholds, multipliers, and discounts.
- Rewards — Create rewards customers can redeem with their points.
- Store Credits Admin — Manage customer store credit balances.
- Loyalty Points & Tiers (POS) — How loyalty works from the cashier's perspective.