Pricing Models
Use this page to choose how a product is priced — one fixed price, a price per weight, or a lower price when customers buy several.
Quick steps
All three start the same way: go to Products, open the product and click the Pricing tab. Prices are entered before tax.
For a fixed price (most products):
- Leave Pricing Model on Simple Pricing.
- Enter the price, and what you pay your supplier in Cost (optional) if you want margin reports.
- Click Update Product.
For flower and other products sold by weight:
- Choose Custom Weight to type a price for each weight, or Quality Tier to use one of your pricing templates (AA, AAA and so on).
- For Quality Tier, pick the template under Pick a tier:.
- Click Update Product.
For a multi-buy deal (e.g. "5 for $25"):
- Under Bulk / Multi-Buy Pricing (Optional), tick Enable bulk pricing tiers.
- Choose how the deal applies — Every unit gets the deal price or Only complete packs get the deal.
- Fill in Buy (e.g.
5) and Total price (e.g.25.00). Use + Add tier for more break points. - Click Update Product.
Common questions
I can't pick Custom Weight or Quality Tier. The product's unit type has to be set to weight first.
Can I enter prices with tax included? No. Work backwards instead: for an $11.30 shelf price with 13% HST, enter $10.00.
Should I use a multi-buy deal or a Sale Discount? Multi-buy is an everyday lower price for buying more. A Sale Discount (on the Specials tab) is a temporary markdown. Don't use both on one product — they stack.
How do I stop a product ever being discounted? On its Specials tab, tick Exclude from automatic promotions. Tick Also block manual discounts at the register too if clerks shouldn't discount it by hand.
Does changing the price change old sales? No. Past sales keep the price that was charged.
More detail: the pricing models side by side
Overview of Pricing Models
| Model | Best For | How It Works |
|---|---|---|
| Standard Pricing | Most products | You set a fixed price per unit. |
| Tiered Pricing | Weight-based products (cannabis) | Different prices per weight (1g, 3.5g, 7g, etc.), typed in yourself or taken from a quality-grade pricing template. |
| Bulk / Multi-Buy Pricing | Unit products sold in volume | A lower price when the customer buys a set quantity or more (e.g. "Buy 5 for $25"). |
All prices in Brother POS are entered pre-tax. Tax is calculated at the time of sale based on your store's tax configuration. See Tax Configuration for details.
Comparing Pricing Models
| Feature | Standard | Tiered | Bulk / Multi-Buy |
|---|---|---|---|
| Fixed price per unit | Yes | Per weight | Lower at higher quantity |
| Weight-based selling | No | Yes | No |
| Quality grades | No | Optional | No |
| Price changes based on | — | Weight chosen | Quantity bought |
| Best for | General retail | Cannabis/weight products | Unit products sold in volume |
| Needs a store setting | No | Enable Pricing Templates (for quality grades only) | No |
More detail: standard pricing
Standard Pricing
Standard pricing is the default and most straightforward model. You set a single selling price for the product, and that price is charged at the register.
Setting a Standard Price
- Go to Admin > Products and open the product you want to price.
- Open the Pricing tab and leave Pricing Model on Simple Pricing.
- Enter the price (pre-tax selling price).
- Optionally enter the Cost (optional): what you pay your supplier. It's used for margin reporting and is never shown to customers.
- Click Update Product.
Example
| Field | Value |
|---|---|
| Product | Rolling Papers (King Size) |
| Price | $3.99 |
| Cost | $1.50 |
| Margin | $2.49 (62.4%) |
At the register, the product sells for $3.99 plus applicable tax.
When to Use Standard Pricing
- Products sold as individual units (papers, accessories, beverages, merchandise).
- Products where the price does not vary by weight or quantity.
- Products with fixed retail pricing (manufacturer's suggested retail price).
More detail: pricing by weight and quality tiers
Tiered Pricing
Tiered pricing is designed for weight-based products, most commonly cannabis. Instead of a single price, you set different prices for different weights.
How It Works
Each product can have prices for multiple weights:
| Weight | Price |
|---|---|
| 1g | $10.00 |
| 3.5g | $30.00 |
| 7g | $55.00 |
| 14g | $100.00 |
| 28g | $180.00 |
At the POS register, when a cashier selects this product, they choose a weight, and the matching price is charged.
Setting Up Tiered Pricing on a Product
The weight-based pricing models are only available when the product's unit type is set to weight.
- Go to Admin > Products and open a weight-based product.
- Open the Pricing tab and choose a Pricing Model:
- Custom Weight: type your own price for each weight.
- Quality Tier: pick a pricing template (e.g., AA, AAA, AAAA) so the product uses that template's prices.
- For Quality Tier, choose the template from Pick a tier:. If you don't see the one you want, use Create one in Pricing Templates.
- Click Update Product.
The weights on offer (1g, 3.5g, 7g, etc.) come from your store's weight presets. See Weight Presets to add or change them.
Quality Tier Pricing
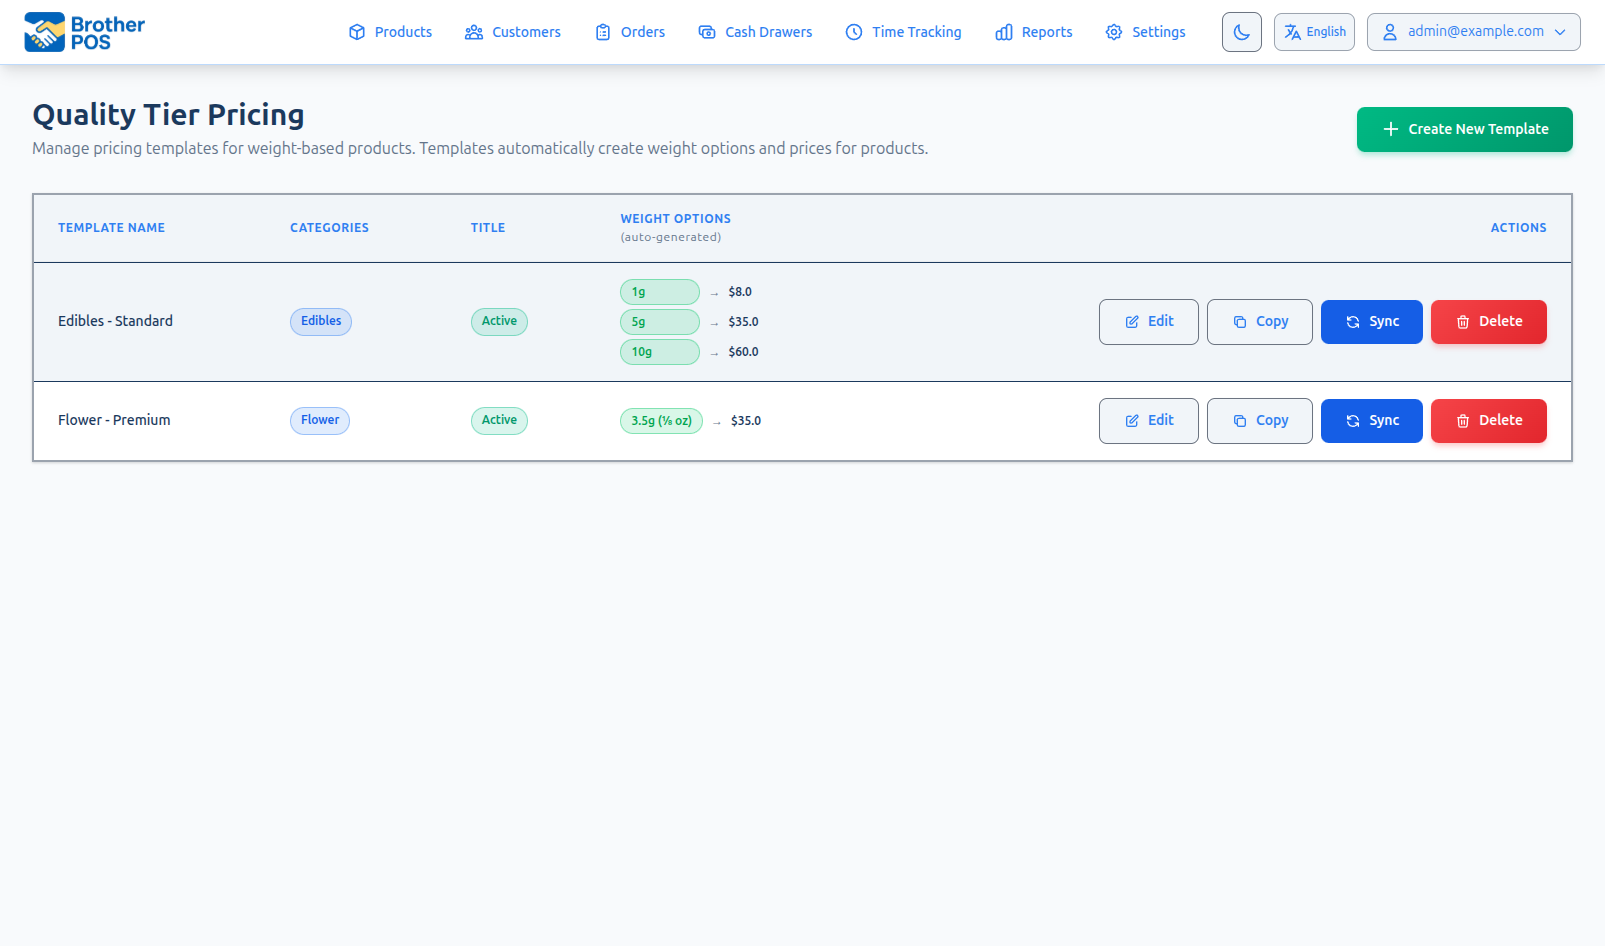
If your store uses pricing templates, prices can be broken down by grade. This creates a pricing matrix where each cell is a specific weight and grade combination.
| 1g | 3.5g | 7g | 14g | 28g | |
|---|---|---|---|---|---|
| AA | $6 | $18 | $32 | $58 | $100 |
| AAA | $8 | $25 | $45 | $82 | $150 |
| AAAA | $10 | $32 | $58 | $105 | $190 |
| AAAA+ | $12 | $38 | $70 | $130 | $240 |
Editing a template changes the prices of every product on that tier, except products whose prices you have customized. For detailed information, see Tier Pricing.
When to Use Tiered Pricing
- Cannabis flower and concentrates sold by weight.
- Any weight-based product where a larger weight should cost less per gram.
More detail: bulk / multi-buy pricing and its two modes
Bulk / Multi-Buy Pricing
Bulk pricing (also called multi-buy or quantity pricing) gives the customer a lower price when they buy a set quantity or more. It is for products sold as individual units, for example "Buy 5 pre-rolls for $25."
This is a permanent part of the product's regular price, not a temporary promotion. As soon as the cashier rings up enough units, the lower price kicks in automatically.
How It Differs From Tiered Pricing
These two models sound similar but are used for different products:
- Tiered pricing is for weight-based products (cannabis flower). The price changes based on the weight the customer selects (1g vs. 3.5g vs. 7g).
- Bulk / multi-buy pricing is for unit products. The price changes based on how many units the customer buys (1 vs. 5 vs. 10).
A product uses one or the other, not both.
How It Differs From a Sale Discount
Bulk pricing is a permanent lower price at higher quantities. It is part of the product's everyday price. A Sale Discount is a temporary markdown shown to customers as "on sale."
Bulk pricing and a Sale Discount on the same product will stack (the customer gets both reductions), which is almost never what you want. Pick one. Use bulk pricing for an always-on volume deal; use a Sale Discount for a limited-time markdown.
Setting Up Bulk Pricing
You set bulk pricing on the product's Pricing tab, in the Bulk / Multi-Buy Pricing (Optional) section. This section only appears for unit-based products (not weight-based and not product variations).
- Go to Admin > Products and open the product.
- Open the Pricing tab and find Bulk / Multi-Buy Pricing (Optional).
- Check Enable bulk pricing tiers.
- Choose how the deal applies (see the two modes below).
- For each tier, fill in Buy (the quantity at which the deal starts, 2 or more) and Total price (what the customer pays for that many, e.g. Buy 3 for a total of $25.00).
- Click + Add tier to add more break points, or the X beside a tier to remove it.
- Click Update Product.
Two Ways the Deal Can Apply
When bulk pricing is on, you pick one of two modes under How does the deal apply?:
| Mode | What it does | Example (deal: buy 5 for $25, regular $7) |
|---|---|---|
| Every unit gets the deal price (threshold) | Once the customer reaches the quantity, all their units drop to the deal price ($5.00 each). | Buy 6 → all 6 at $5.00 = $30.00 |
| Only complete packs get the deal (bundle) | Only whole packs get the deal price. Extra units that don't complete a pack stay at the regular price. | Buy 6 → one pack of 5 for $25.00 + 1 at $7.00 = $32.00 |
- Use threshold for a straightforward "hit this many and everything's cheaper" volume deal.
- Use bundle for a true multipack: "5 for $25" where a 6th loose unit rings up at full price.
Under the tiers, What the customer pays: shows the total at a few sample quantities as you type, so you can confirm the mode behaves the way you expect.
Example
To offer "Buy 5 for $25" on a product whose regular price is $7:
| Buy | Total price |
|---|---|
| 5 | $25.00 |
You can add several break points for deeper discounts at higher counts:
| Buy | Total price |
|---|---|
| 5 | $25.00 |
| 10 | $45.00 |
In threshold mode, a customer buying 1-4 units pays the regular $7 each. At 5-9 units they pay $5.00 each, and at 10+ they pay $4.50 each.
Unchecking Enable bulk pricing tiers and saving clears the deal. The product returns to its regular price for all quantities.
More detail: keeping a product out of promotions
Excluding a Product from Promotions
Some products should always sell at their regular price: a loss-leader, a consignment item, a low-margin SKU, or something you're contractually not allowed to discount. Rather than remember to leave it out of every campaign, you can lock it to full price on the product itself.
On the product's Specials tab, in the Promotion Exclusions section, you have two checkboxes:
| Setting | Effect |
|---|---|
| Exclude from automatic promotions | No sale campaigns, BOGO, freebies, or loyalty bonuses ever apply to this product, and storefront promo codes skip it too. It stays at its regular price no matter what store-wide deals are running. |
| Also block manual discounts at the register | On top of the above, clerks can't apply a line-item discount to this product on the POS. |
- Turn on the first box to shield the product from every automatic deal while still letting a manager discount it by hand if needed.
- Turn on the second box as well to fully lock the price: no automatic deals and no manual line discounts.
These exclusions hold even when the register is offline. BOGO and freebie promotions won't fire on an excluded product while the register has no connection either.
If a product should stay out of just one campaign and keep the rest, leave these boxes off. Use the Take off button on the product's Specials tab instead. See Taking a Product Off One Campaign.
Promotion exclusions cover sale campaigns, BOGO, freebies, loyalty bonuses, and manual line discounts. They do not turn off a product's own Bulk / Multi-Buy Pricing. That's part of the product's regular price, not a promotion. Clear the bulk tiers if you want a single flat price at every quantity.
More detail: prices at the register, tax, and switching models
Price Display at the POS
The POS register shows the customer-facing price:
- Standard pricing: the price appears on the product card. If the product is on sale, the sale price shows with the regular price crossed out.
- Tiered pricing: the product card doesn't show a single price. The cashier taps the product, picks a weight, and each weight shows its own price.
Product costs are for margin reporting in the admin panel. The POS register doesn't show them on product cards or in the cart.
Tax and Pricing
All prices in Brother POS are pre-tax:
- You enter the price without tax.
- Tax is calculated automatically at checkout based on your store's tax rate.
- The receipt shows the subtotal, tax amount, and total.
This means if you set a product price to $10.00 and your tax rate is 13% HST, the customer pays $11.30 at the register.
There's no setting to enter prices with tax included. If you want your shelf price to include tax, work backwards: if your desired shelf price is $11.30 with 13% HST, set the product price to $10.00 ($11.30 / 1.13).
Changing a Product's Pricing Model
You can switch a product between pricing models at any time:
- Open the product in Admin > Products.
- On the Pricing tab, change the Pricing Model.
- Enter the new pricing data.
- Click Update Product.
Historical sales are not affected. They keep the price that was charged at the time of sale.
More detail: common workflows and troubleshooting
Common Workflows
Setting up pricing for a new product category
- Decide which pricing model fits the category (standard for accessories, tiered for cannabis flower).
- For graded flower, set up your pricing templates first so each product only needs a tier picked.
- Create products and enter prices according to the chosen model.
- Review prices at the POS to verify they display correctly.
Reviewing margins across products
- Go to Admin > Reports, open Sales Report and click the Profit tab.
- Pick a date range.
- Review margin percentages for each product.
- Adjust costs or prices for products where margins are too low or too high.
Adjusting for a supplier price increase
- Update the Cost for affected products.
- For standard-priced products, manually adjust the selling price if needed.
- For tiered products, update each weight's price, or edit the pricing template to change every product on that tier at once.
Troubleshooting
| Problem | Solution |
|---|---|
| Price shows $0.00 at the POS | The product may not have a price set. Open the product in admin and enter a price. |
| Custom Weight or Quality Tier can't be selected | These models need the product's unit type set to weight. |
| Quality tiers not appearing | Quality tier pricing needs the Enable Pricing Templates setting turned on. Check the Products & Inventory tab of your store settings, then make sure at least one pricing template exists. |
What's Next?
- Sale Campaigns — Create date-range promotions with percentage or dollar discounts.
- Freebie Campaigns — Set up spend-threshold campaigns that auto-add free items.
- Tier Pricing — Deep dive into quality tier pricing matrices.
- Tax Configuration — Set up your store's tax rates.