Feature Flags
Feature flags let you turn optional Brother POS modules on or off for your store. Disabled features are completely hidden from the admin panel and POS interface, keeping your workflow clean and focused on the tools you actually use.
Accessing Feature Flags
- Log in to the Admin Panel.
- Click Settings in the top navigation bar.
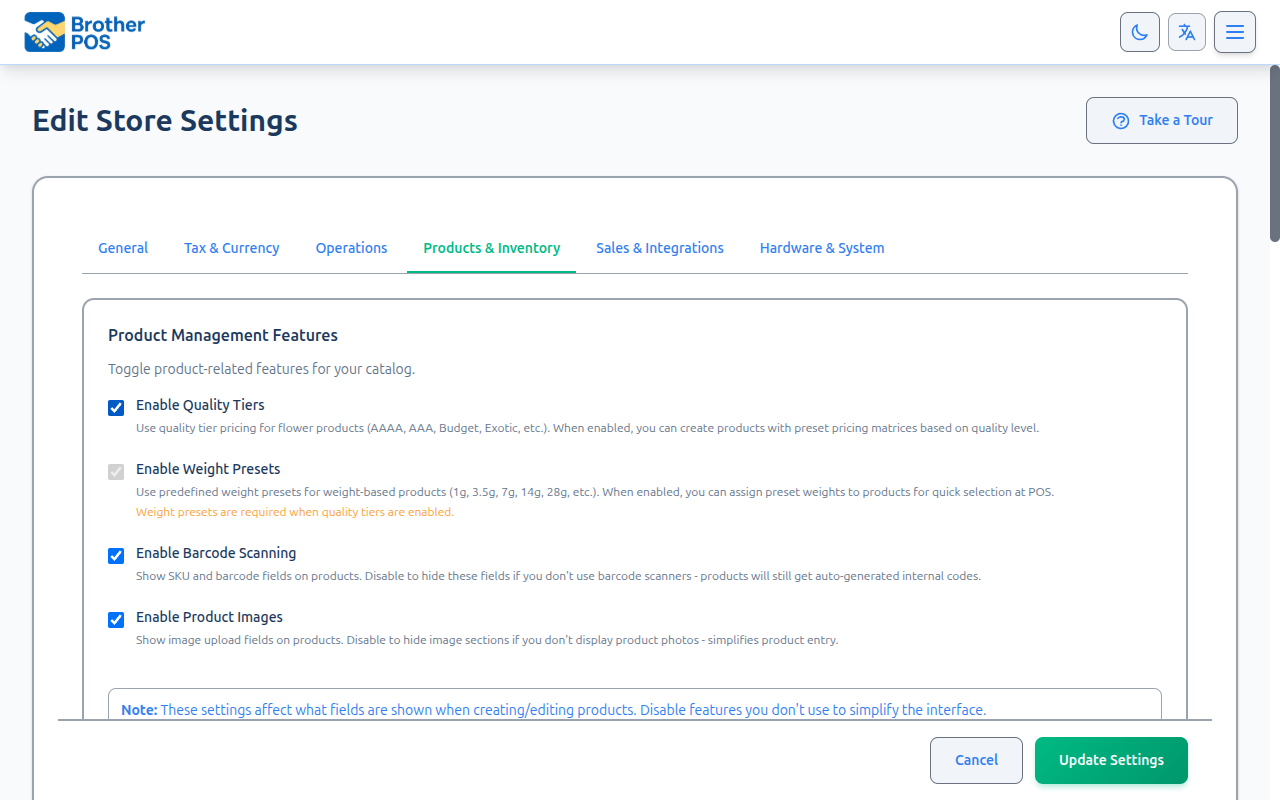
- Click Edit Settings.
- Feature flags are distributed across the settings tabs:
| Flag group | Tab |
|---|---|
| Additional tax, age verification | Tax & Currency |
| Time tracking, consignment, payouts, promo games | Operations |
| Payment methods (gift cards, store credit, house accounts) | Operations (Payment Methods section) |
| Quality tier pricing, weight presets, cannabis detail fields (THC/CBD, strain type, effects, medical, terpene) | Products & Inventory |
| Storefront, local delivery, shipping, wholesale portal, retailer connections | Sales & Integrations |
| Label printing, scale, customer display, menu board, receipt/label printer hardware | Hardware & System |
| Email receipts, report digests, auto-reorder | Notifications |
Some feature flags are not user-configurable — they are set at the platform (super-admin) level when the store is created and cannot be toggled by store admins. These include: enable_cannabis_features, enable_distributor_ordering, enable_wholesale_receiving, enable_buy_spins, and industry-mode toggles. Contact Brother POS support if you need these changed.
How Feature Flags Work
Each feature flag is a simple on/off toggle. When a feature is turned off:
- Its menu items are hidden from the admin panel.
- Its POS-facing components are removed from the register interface.
- Its API endpoints remain in the system but return no data.
- Its data is preserved -- nothing is deleted when you turn a feature off.
When you turn a feature back on, all previously configured data reappears exactly as you left it.
Toggling a feature flag off never deletes data. If you configured delivery zones and then disabled delivery, those zones will still be there when you re-enable the feature.
Cannabis Features
These flags control cannabis-specific functionality. All cannabis detail toggles live on the Products & Inventory tab and only appear when Cannabis Features is enabled for your store.
The master Enable Cannabis Features toggle is set by Brother POS support at store creation and cannot be changed from your store settings. If you need to switch between cannabis and general retail mode, contact support. When cannabis mode is enabled, the store gets access to: strain library, THC/CBD and terpene detail fields, cannabis compliance reporting, daily purchase limit tracking, and quality-tier pricing.
Enable Pricing Templates
Enables pricing template badges (e.g., Budget, AAAA, Premium) and quality-based pricing matrices. The form label reads "Enable Pricing Templates"; internally this is stored as use_quality_tiers and the feature is sometimes called "Quality Tiers." This toggle only appears when Cannabis Features is enabled.
Use Weight Presets
Enables weight preset buttons (1g, 3.5g, 7g, etc.) in the POS for weight-based products.
Show THC/CBD
Displays THC and CBD percentages on product cards and labels.
Show Strain Type
Displays Indica/Sativa/Hybrid classification on product cards.
Show Effects
Displays effect tags (Relaxed, Energetic, etc.) on product detail views.
Show Medical Benefits
Displays medical benefit tags on product detail views.
Show Dominant Terpene
Displays the dominant terpene on product cards.
If your store does not sell cannabis, turn off the Cannabis Features toggle. This single toggle hides all cannabis-related sections and simplifies your admin panel for general retail use.
Operational Features
Enable Local Delivery
Enables the delivery management system:
- Delivery zones with postal code patterns and fees
- Driver management and mobile PWA
- Delivery order tracking
- Route management
See Delivery & Shipping for configuration.
Enable Shipping
Enables shipping zone configuration and rate calculation for orders that are shipped rather than delivered locally or picked up.
Enable Time Tracking
Enables employee time clock features:
- Clock in / clock out at the POS
- Time break tracking
- Hours worked reporting
Enable Label Printing
Enables product label printing features:
- Label template management
- Print labels from the product list
- Print labels from the POS
- Label printer configuration in hardware settings
See Label Printers for hardware setup.
Enable Scale
Enables scale integration for weight-based products:
- Web Serial API connection
- Baud rate auto-detection
- Manual weight entry fallback
See Scales for hardware setup.
Enable Payouts
Enables the ability to record cash payouts from the register drawer (e.g., paying a vendor from the register).
B2B and Wholesale Features
Enable Wholesale Portal
Enables a customer-facing wholesale portal where approved wholesale buyers can browse your catalog and place orders. Located on the Sales & Integrations tab.
Enable Retailer Connections (B2B)
Enables the pairing system for connecting your store with wholesale distributors using 6-character pairing codes. Located on the Sales & Integrations tab.
Enable Distributor Ordering (outbound B2B ordering) and Enable Wholesale Receiving (inbound wholesale order processing) are platform-level toggles set by Brother POS support when your store is provisioned. They do not appear in your own settings UI. Contact support if you need them changed.
B2B features require encryption keys to be generated. When you enable any B2B feature for the first time, Brother POS will automatically generate the necessary encryption keys. See B2B & Wholesale for the full setup guide.
Sales & Service Features
Enable Gift Card Payments
Located in the Payment Methods section of the Operations tab. The form label reads "Enable Gift Card Payments". Turning this on:
- Surfaces the Gift Cards admin page and sidebar link
- Adds gift card as a tender button on the POS
- Enables tracking balances, transactions, and statuses
- Enables bulk creation and CSV export
See Gift Cards (Admin) and Gift Cards (POS) for details.
Enable Age Verification
Located on the Tax & Currency tab (below the Additional Tax settings). Enables age verification prompts on the POS for age-restricted products:
- Configurable minimum age (default: 19, range 1–99)
- Verification mode: "When adding to cart" or "At checkout"
- Cashier must confirm customer meets age requirement
See Age Verification for configuration.
Promotional Features
Enable Promo Games
Enables the promo games system (spin-to-win, scratch cards, slot machines, plinko):
- Create and manage promotional games with configurable rewards
- Games trigger automatically after qualifying sales
- Customer display shows game animations and win results
- Win history and reward code tracking
See Promo Games for configuration.
Interactive Promo Games
Enables interactive game modes where customers can physically interact with the game on a touchscreen (scratch the card, drop the plinko ball). When disabled, all games auto-play.
The Enable Buy Spins flag — which turns on purchasable game plays — is a platform-level toggle set by Brother POS support. Contact support if you need it enabled for your store.
Storefront Features
Enable Storefront
Enables the customer-facing online storefront:
- Public product catalog with themes and customizable sections
- Age gate for age-restricted stores
- Custom domain support (requires Commerce tier)
- Announcement bar, featured products, deals section
See Storefront for configuration.
Other Features
Enable Consignment
Enables consignment inventory tracking -- products owned by a third party and sold on their behalf, with commission tracking.
Enable Additional Tax
Enables the additional tax layer for product-specific surcharges (e.g., vapour products tax). See Tax Configuration for details.
Enabling a Feature
- Navigate to Settings > Edit Settings and find the relevant tab.
- Find the feature you want to enable.
- Click the toggle to switch it to On (green).
- Click Save at the bottom of the page.
- The new feature's menu items and interface components will appear immediately.
Enabling a feature makes it visible, but most features require additional configuration before they are fully functional. For example, enabling delivery makes the Delivery menu appear, but you still need to set up delivery zones and onboard drivers.
Disabling a Feature
- Navigate to Settings > Edit Settings and find the relevant tab.
- Find the feature you want to disable.
- Click the toggle to switch it to Off (gray).
- Click Save.
- The feature's menu items and interface components are hidden immediately.
Active data related to the feature (e.g., pending delivery orders) will still be processed in the background, but new activity cannot be initiated.
Checking Which Features Are Active
Feature flags are distributed across the settings edit form tabs (Tax & Currency, Operations, Products & Inventory, Sales & Integrations, Hardware & System, Notifications). There is no dedicated Feature Flags page. To check which features are active, visit Settings > Edit Settings and review the toggles on each tab, or go to Settings (the summary view) which shows a condensed list of all enabled features grouped by section.
Common Questions
Can different stores in a multi-store setup have different features enabled? Yes. Feature flags are configured per store. Each store can have a unique set of features enabled based on its needs.
Can a manager change feature flags? No. Feature flag configuration requires Admin-level access. Managers cannot enable or disable features.
Do feature flags affect integrations? Disabled features do not interfere with other active integrations. Turning a feature off simply hides it from the interface.
What's Next?
- Product Display -- Fine-tune which product fields appear in the POS.
- Registers -- Set up named registers for multi-register stores.
- General Settings -- Configure your store identity and regional settings.