Product Variations
Use this page to sell one product in several sizes or packs, each with its own price and stock.
Quick steps
- Go to Products and open the product.
- On the Details tab, set Product Type to Variable Product and click Update Product.
- Open the Variations tab and click Add the first variation (or Add Variation if it already has some).
- Fill in a row for each size — a Name like "3.5g" and a Price. Stock, SKU and barcode are optional. Click + Add Another Variation for more rows.
- Click Create Variations. On the register, tapping the product now opens a Select Option window.
Every row the same price? Type it under Quick Fill All Variations and click Apply to All.
Common questions
Should I use variations or options? Use variations when each size needs its own price and stock count. If every flavour costs the same and shares one stock count, use named options instead.
How do I change a variation's price or stock? On the Variations tab, click the pencil icon to open that variation, change it, and click Update Product. Admins can change several at once: tick them and use Update Price or Update Stock.
Why doesn't a variation show on the register? It is out of stock or turned off. A product with only one variation skips the window and goes straight to the cart.
Can I change the order they appear in? No — they are listed alphabetically by name. Name them so they sort well.
More detail: when to use variations
Variations let you sell the same product in multiple sizes, weights, or configurations — each with its own SKU, price, and stock level. For example, a cannabis flower product might come in 1g, 3.5g, 7g, and 14g options.
When to Use Variations
Use variations when:
- The same product is sold in different sizes (e.g., 1g, 3.5g, 7g, 14g, 28g).
- The same product comes in different package types (e.g., pre-roll single, pre-roll 3-pack).
- You want a single product listing on the POS with selectable options rather than separate products.
Do not use variations when:
- Products are fundamentally different items (e.g., different strains). Create separate products instead.
- You only sell one size of the product. A product with no variations is perfectly fine.
- Every flavour has the same price and shares one stock count. Use named options instead.
More detail: creating variations and every field
Creating Variations
A product can offer variations or be a bundle, not both. You can't add variations under a bundle, and a product with variations can't be turned into a bundle. A single variation can be a bundle in its own right, though — for example a "Large" gift box. See Bundles, Combos & Buckets.
Adding the First Variations to a Product
- Open the product. On the Details tab, set Product Type to Variable Product and click Update Product.
- Open the Variations tab and click Add the first variation to open the Add Variations page.
- Fill in a row for each variation. Click + Add Another Variation for more rows.
- Click Create Variations.
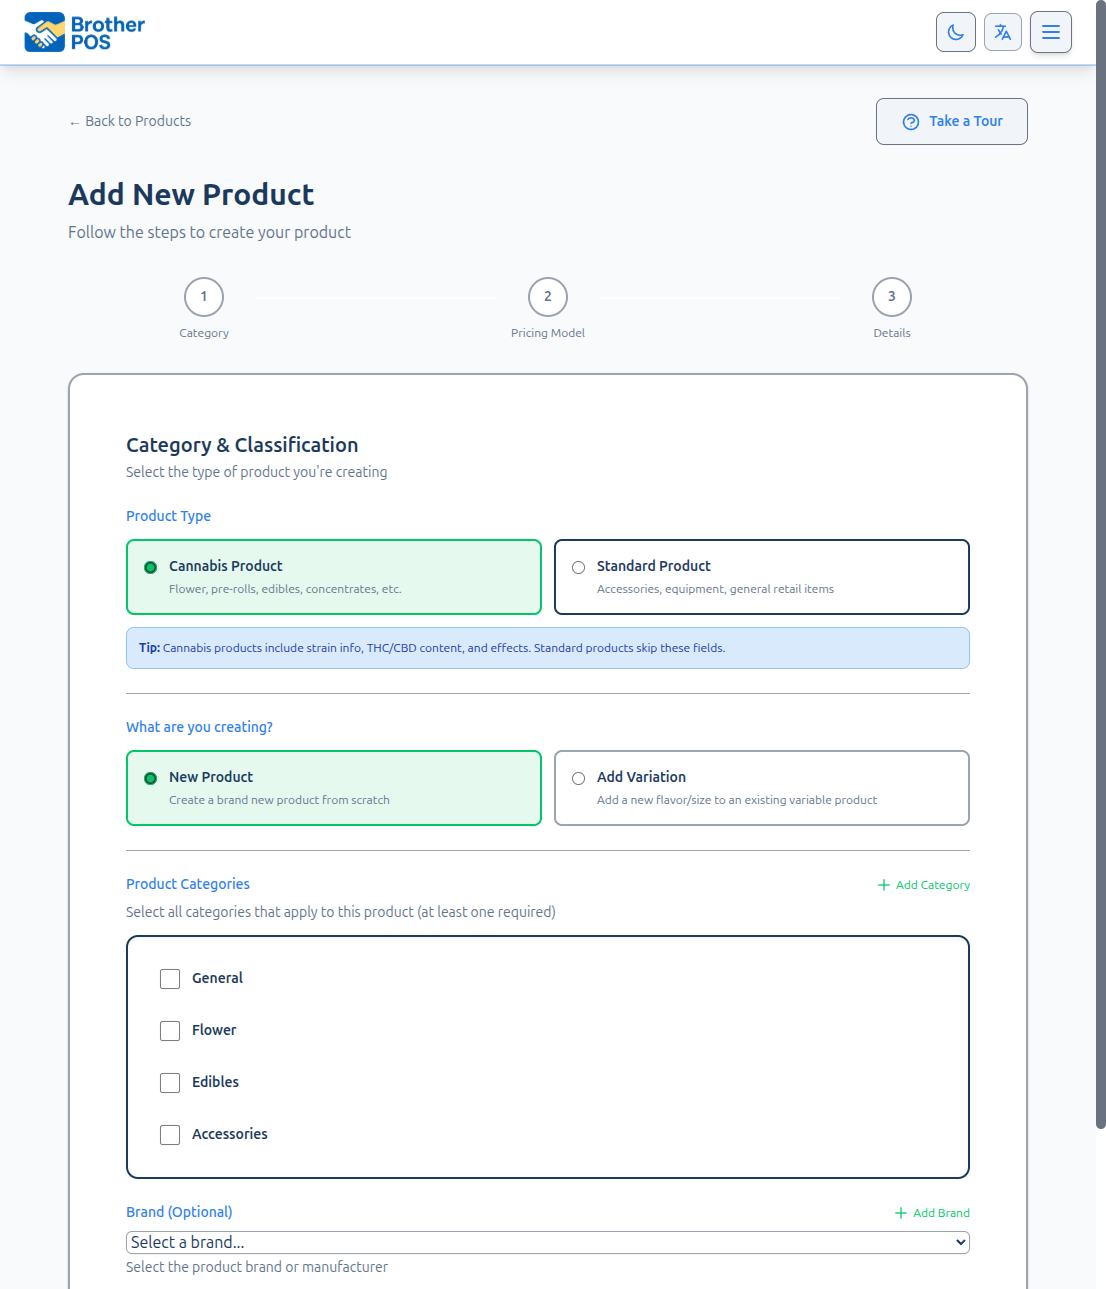
You can also go to Products, click Add New Product, choose Add Variation on step 1 and pick the product under Select Parent Product (only Variable Products are listed), then fill in the variations and finish the wizard.
You can also turn products you already have into variations of one parent with Make Variations on the product list. See Bulk Operations.
Adding More Variations
Once a product has at least one variation:
- Open the product and go to the Variations tab.
- Click Add Variation. The Add Variations page opens, listing the variations the product already has.
- Fill in a row for each new variation. Click + Add Another Variation for more rows.
- Click Create Variations.
You are taken back to the product with a message saying how many variations were added.
Variation Fields
| Field | Required | Description |
|---|---|---|
| Name | Yes | A short label for this variation (e.g., "3.5g", "7g", "Pre-Roll 3-Pack"). |
| Price | Yes | The pre-tax selling price for this variation. |
| Stock | No | Starting stock for this variation. |
| SKU (Optional) | No | Generated for you if left blank. If you enter one, it must not be used by any other product or variation. |
| Barcode | No | Generated for you if left blank. |
| Description | No | An optional description for this variation. |
| Image | No | A photo for this variation. |
Stores with cannabis features also see Strain Type (leave it on Inherit from parent to match the parent), THC and CBD.
Each variation takes its unit type, brand and categories from the parent product.
If the product already has stock of its own when you add its first variations, leave their Stock empty: the product's stock moves into the first variation in the list, and the move is recorded in both stock histories. New variations take the product's cost, so the moved stock keeps its value. If you enter stock for them too, Brother POS stops and asks you to either leave it empty or count the product to 0 first, because it can't tell which units are which.
When adding several variations at the same price or stock, enter the value under Quick Fill All Variations and click Apply to All.
Adopt a consistent SKU pattern for variations. For example:
- Parent:
BD-001 - 1g variation:
BD-001-1G - 3.5g variation:
BD-001-35G - 7g variation:
BD-001-7G
This makes scanning and CSV management much easier.
More detail: how variations appear on the register
How Variations Appear on the POS
When a cashier selects a product that has variations:
- The product tile opens a Select Option window.
- Each variation is shown with its name and price, in alphabetical order.
- The cashier taps the desired variation to add it to the cart.
- The cart shows the variation's full name — the parent name plus the variation label (e.g., "Blue Dream - 3.5g").
A few things to know:
- Only one variation? It is added straight to the cart, with no window.
- Out of stock variations are left out of the window, unless the product is allowed to sell below zero.
- Inactive variations don't appear on the register.
- With more than ten variations, the window adds a search box.
More detail: editing, turning off and deleting variations
Managing Existing Variations
The Variations tab lists each variation with its SKU, price and stock.
Editing a Variation
- Open the parent product and go to the Variations tab.
- Click the Edit (pencil) icon next to the variation. The variation opens on its own product page.
- Update the fields you need to change.
- Click Update Product.
Updating Several Variations at Once
Tick the variations you want (or Select All), then use Update Stock, Update Price or Update Cost and click Update Selected Variations. Delete Selected removes the ticked variations. The stock, price and cost updates are available to admins only.
For stock, choose Add to current stock or Set stock to this amount. On a store that keeps stock by location, a Location box also appears:
- Pick a location to work on that one shelf: Set means "this shelf holds this many" (a count), and Add puts the new stock on that shelf.
- Leave it on Whole stock (not one shelf) and Set skips any variation whose stock sits on more than one shelf, since there's no way to tell which shelf was wrong. The message names them, for example: "Skipped Blue Dream - 3.5g, Blue Dream - 7g: their stock is on more than one shelf. Pick a location to count one."
Variation Display Order
On the register, variations are listed alphabetically by name. There is no drag-and-drop reordering, so name them in a way that sorts well.
Turning a Variation Off
Each variation can be deactivated on its own. On the Products page, open the product's variation list and click the deactivate icon next to the variation; click the activate icon to bring it back. An inactive variation stays in your catalog but isn't offered on the register.
Deactivating a parent product from the product list deactivates all of its variations too.
Deleting a Variation
- Open the parent product and go to the Variations tab.
- Click the Delete (trash) icon on the variation.
- Confirm in the Delete Variation window.
Deleting a variation removes it from the product and the register. Past sales of that variation are kept for your reports. Deleting a parent product deletes all of its variations as well.
More detail: stock, CSV files and best practices
Stock Tracking for Variations
Each variation maintains its own independent stock count. This means:
- On the parent product's Inventory tab, Total Stock (All Variations) shows the sum of every variation's stock. The parent has no stock count of its own to edit.
- Stock is changed on each variation — on the variation's own page, with Update Stock on the Variations tab, or through a stock adjustment.
- Each variation has its own low stock threshold.
Variations and CSV Import/Export
When importing or exporting products via CSV:
- Each variation is its own row in the CSV file.
- The
parent_skucolumn holds the parent product's SKU, which links the variation to its parent. - The
variation_namecolumn holds the variation's label.
See CSV Import and CSV Export for the exact column format.
Best Practices
- Be consistent with labels. Use the same format across all products (e.g., always "3.5g" not sometimes "3.5 grams" and sometimes "3.5g").
- Set up all variations before activating. Create the parent product as inactive, add all variations, then set it to active.
- Keep variation counts manageable. A handful of variations is easy to pick from. Past ten, cashiers have to search the list.
- Plan your SKUs. A SKU that is already used elsewhere is rejected, so decide on a pattern before adding variations.
What's Next?
- Images — Upload photos for the product and its variations.
- CSV Import — Bulk-add products with variations from a spreadsheet.
- Managing Products — Return to the product list.
- Stock Adjustments — Adjust stock for individual variations.