Product Images
Product images help cashiers identify products on the POS register and enhance your online store if you use the WooCommerce integration. Brother POS supports a primary image and a gallery of additional images for each product.
There are several ways to add images:
- File upload from your computer
- Image URL paste (e.g., from a supplier website or the built-in strain library)
- QR code phone upload to snap a photo directly from your phone's camera
- Bulk photo upload to photograph many products in one session from your phone
Image Requirements
| Requirement | Details |
|---|---|
| File formats | JPG, JPEG, PNG, WebP |
| Maximum file size | 5 MB per image |
| Recommended dimensions | 800 x 800 pixels (square) |
| Minimum dimensions | 200 x 200 pixels |
| Aspect ratio | Square (1:1) recommended for consistent display |
The POS register displays product images as square thumbnails. Non-square images are cropped to fit, which may cut off important parts of the image. Crop your images to a 1:1 ratio before uploading for the best results.
Upload Methods
Method 1: File Upload from Computer
The most straightforward method when you have image files on your computer.
- Navigate to Products and click Edit on the product you want to update.
- Expand the Product Images (Optional) section.
- Under Upload Image File, click Choose File and select an image from your computer.
- Click Update Product to save.
For gallery images, use the Additional Images field to select multiple files at once.
Method 2: Image URL
Paste a direct URL to an image hosted online. This is useful for supplier-provided images or when using the built-in cannabis strain template library, which auto-fills the URL field.
- On the product edit page, expand Product Images (Optional).
- In the Image URL field, paste the full URL to the image (e.g.,
https://example.com/product.jpg). - Click Update Product to save.
When you select a strain from the Cannabis Strain Template browser on the product edit page, the image URL is automatically populated with the strain's image. You can still override it with your own image.
Method 3: QR Code Phone Upload (Single Product)
Upload a photo directly from your phone's camera without transferring files to your computer. This is the fastest way to photograph individual products.
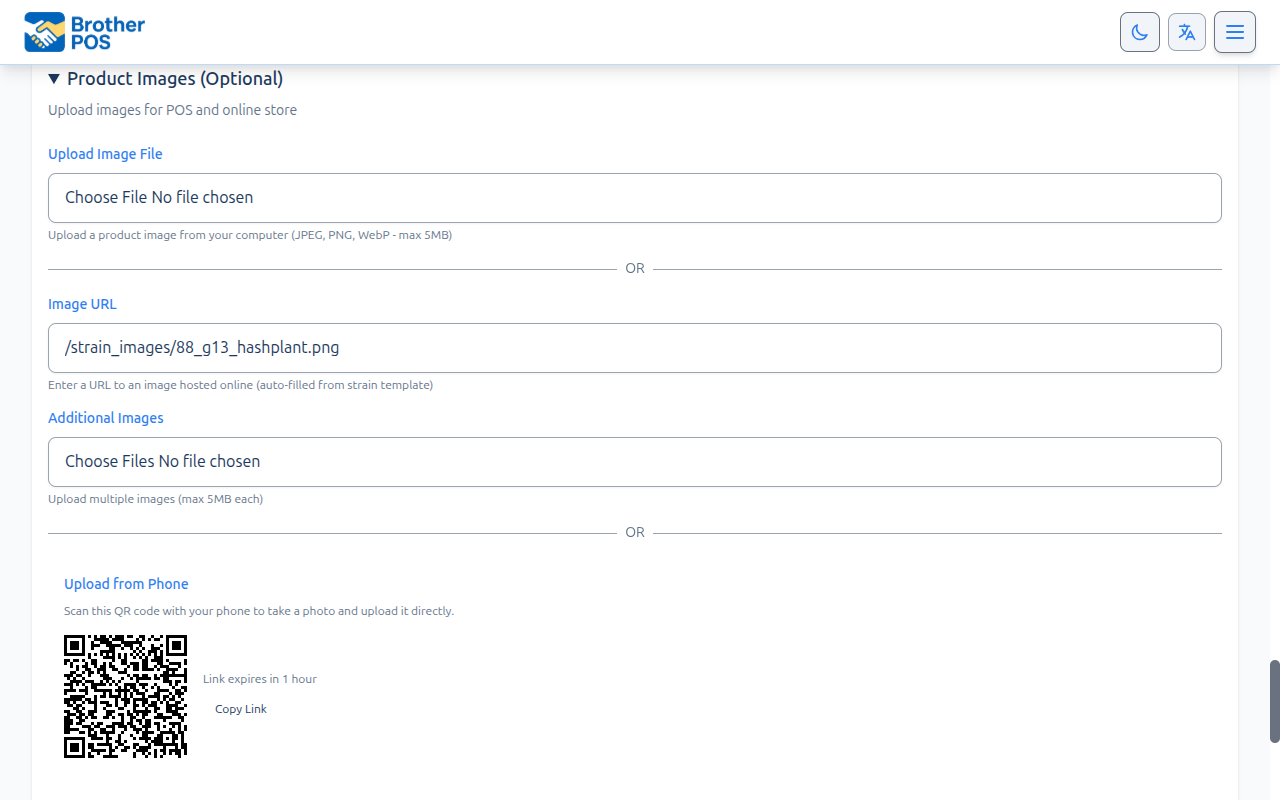
- On the product edit page, expand Product Images (Optional).
- Scroll to the Upload from Phone section. A QR code is displayed.
- Scan the QR code with your phone's camera (or paste the link using the Copy Link button).
- On your phone, you will see the product name and two options:
- Take Photo -- opens your phone's camera to snap a picture directly.
- Choose from Gallery -- pick an existing photo from your phone.
- After selecting or taking a photo, a preview is shown. Tap Upload to send it.
- The image appears on the product edit page in real-time (no page refresh needed).
Key details:
- The upload link expires in 1 hour for security.
- No login is required on the phone -- the link contains a secure, signed token.
- Images are automatically resized (max 1200px) and compressed to JPEG at 85% quality.
- Works on both iPhone and Android.
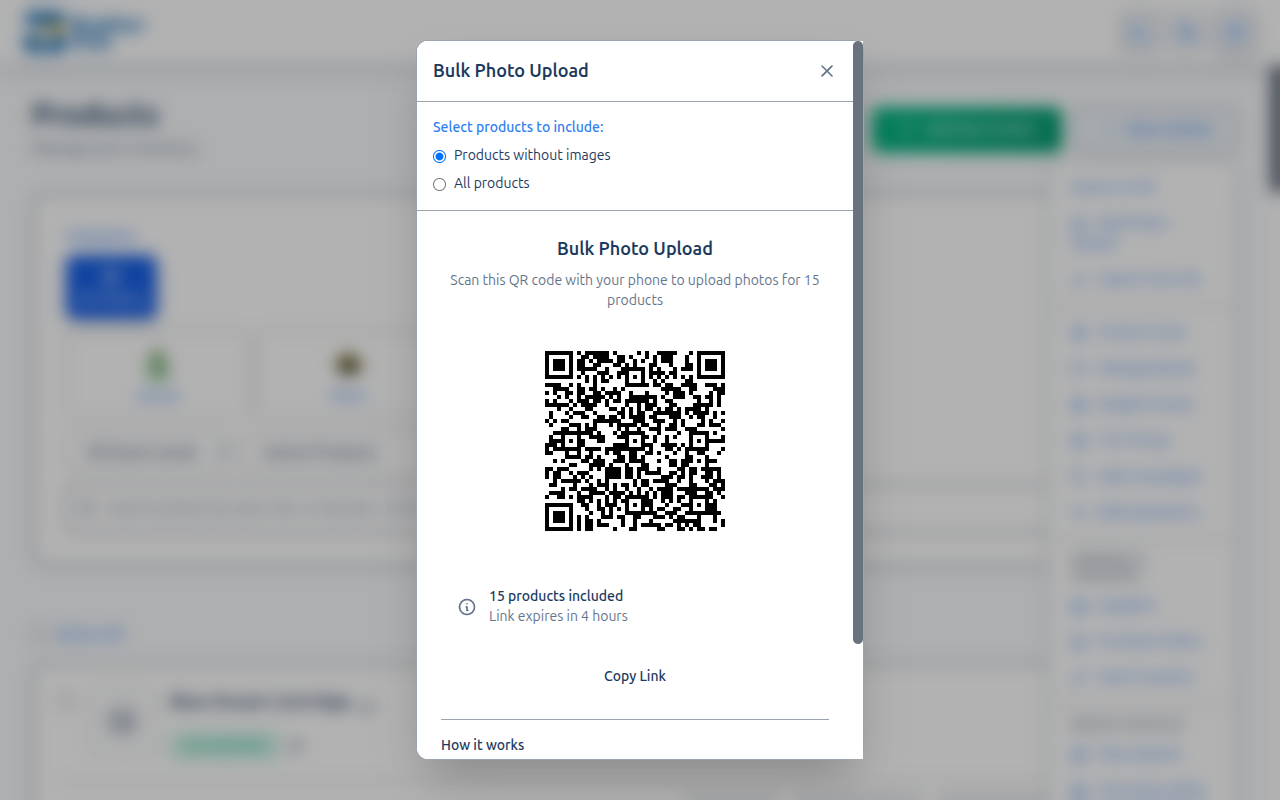
Method 4: Bulk Photo Upload (Multiple Products)
When you need to add images to many products at once, use Bulk Photo Upload. You scan one QR code and then photograph products one after another from your phone.
- Go to the Products page.
- Click More Actions (top-right) and select Bulk Photo Upload.
- In the modal, choose which products to include:
- Products without images (default) -- only shows products that still need photos.
- All products -- includes every product, even those with existing images.
- Scan the QR code with your phone (or click Copy Link).
- On your phone, you will see a list of products. For each product:
- Tap to open the camera or gallery.
- Take or select a photo.
- Tap Upload, then move to the next product.
- Tap Skip to skip a product.
- A progress bar tracks how many products you have completed.
- When done, a completion screen shows your upload stats.
Key details:
- The bulk upload link expires in 4 hours (longer than single product uploads).
- Products are shown 20 per page with pagination.
- Each product displays its name, SKU, and category for easy identification.
- Images update on the admin side in real-time via live broadcast.
When receiving new inventory, create all your products first (or use CSV import), then use Bulk Photo Upload to photograph them all at once. Filter by "Products without images" to see only what still needs a photo.
Inline Image Editing from the Product List
You can also update a product's image directly from the product list without opening the full edit page:
- On the Products page, hover over any product's image thumbnail (or placeholder icon).
- Click the pencil icon that appears on hover.
- An inline form expands where you can upload a file or paste an image URL.
- Click Save to update, or Cancel to close.
This is useful for quick image updates when browsing your catalog.
Managing the Image Gallery
The gallery lets you attach multiple images to a single product. Gallery images are useful for:
- Showing different angles of the product.
- Displaying packaging and labels.
- Syncing multiple images to WooCommerce.
Adding Gallery Images
- Open the product edit page.
- Expand Product Images (Optional).
- Under Additional Images, click Choose Files and select multiple files.
- Click Update Product to save.
Removing Images
- On the product edit page, expand Product Images (Optional).
- Under Current Images, click the X button on the image you want to remove.
- Click Update Product to save.
If you have the WooCommerce integration enabled, gallery images sync to your WooCommerce product gallery. The primary image becomes the WooCommerce featured image, and gallery images become the WooCommerce product gallery. Changes sync on the next WooCommerce sync cycle.
How Images Appear on the POS
On the POS register:
- Product grid -- The primary image displays as a square thumbnail on each product tile.
- Cart -- A small thumbnail appears next to the product name in the cart.
- Product search results -- Thumbnails appear alongside search results.
- No image fallback -- Products without images display a placeholder icon with the first letter of the product name.
Images are optimized and cached for fast loading on the POS. After uploading a new image, it may take a moment to appear on active POS sessions.
Image Optimization
Brother POS automatically processes uploaded images:
- Resizing -- Large images are automatically resized to a maximum of 1200 pixels on the longest side.
- Compression -- Images are converted to JPEG at 85% quality to reduce load times.
- Thumbnail generation -- Multiple sizes are generated for different display contexts (grid tile, cart, detail view).
You do not need to manually optimize images before uploading, but starting with a reasonably sized image (under 5 MB, around 800 x 800 pixels) ensures the fastest upload experience.
Troubleshooting
| Issue | Solution |
|---|---|
| Image does not appear after upload | Wait a few seconds for processing to complete, then refresh the page. |
| Image looks stretched or cropped oddly | Re-upload a square (1:1 aspect ratio) image. |
| Upload fails with size error | Reduce the image file size to under 5 MB. Use an image compression tool. |
| POS still shows old image | The POS caches images. Refresh the POS browser tab or wait for the cache to update. |
| QR code does not work on phone | Make sure your phone has an active internet connection. The QR code encodes your store's cloud URL, so any internet connection will work — no LAN required. |
| QR code link expired | Go back to the product edit page or products list and generate a new QR code. Single product links expire in 1 hour, bulk links in 4 hours. |
| Phone upload page says "Expired" | The token has expired. Return to the admin and open a fresh QR code. |
| Bulk upload not showing my product | Check the filter setting. If set to "Products without images," products that already have an image are excluded. Switch to "All products." |
What's Next?
- Creating Products -- Full guide to creating a new product.
- Variations -- Add size and weight variations to products.
- CSV Import -- Bulk import products (images must be uploaded separately).
- Managing Products -- Browse and manage your full catalog.