Store Setup
This guide walks you through the complete first-time setup of your Brother POS store. Follow this checklist from top to bottom to ensure your store is fully configured before going live.
Allow 30-60 minutes to complete the full setup. You can save your progress at any step and return later — nothing is lost if you close the browser.
Setup Checklist Overview
| # | Task | Priority | Time |
|---|---|---|---|
| 1 | Store Details | Required | 5 min |
| 2 | Tax Configuration | Required | 5 min |
| 3 | Receipt Settings | Required | 5 min |
| 4 | User Accounts | Required | 10 min |
| 5 | Product Categories | Required | 10 min |
| 6 | Products | Required | 15+ min |
| 7 | Feature Flags | Recommended | 5 min |
| 8 | Hardware Setup | Recommended | 10 min |
| 9 | Loyalty Program | Optional | 5 min |
| 10 | Compliance Settings | Conditional | 5 min |
1. Store Details
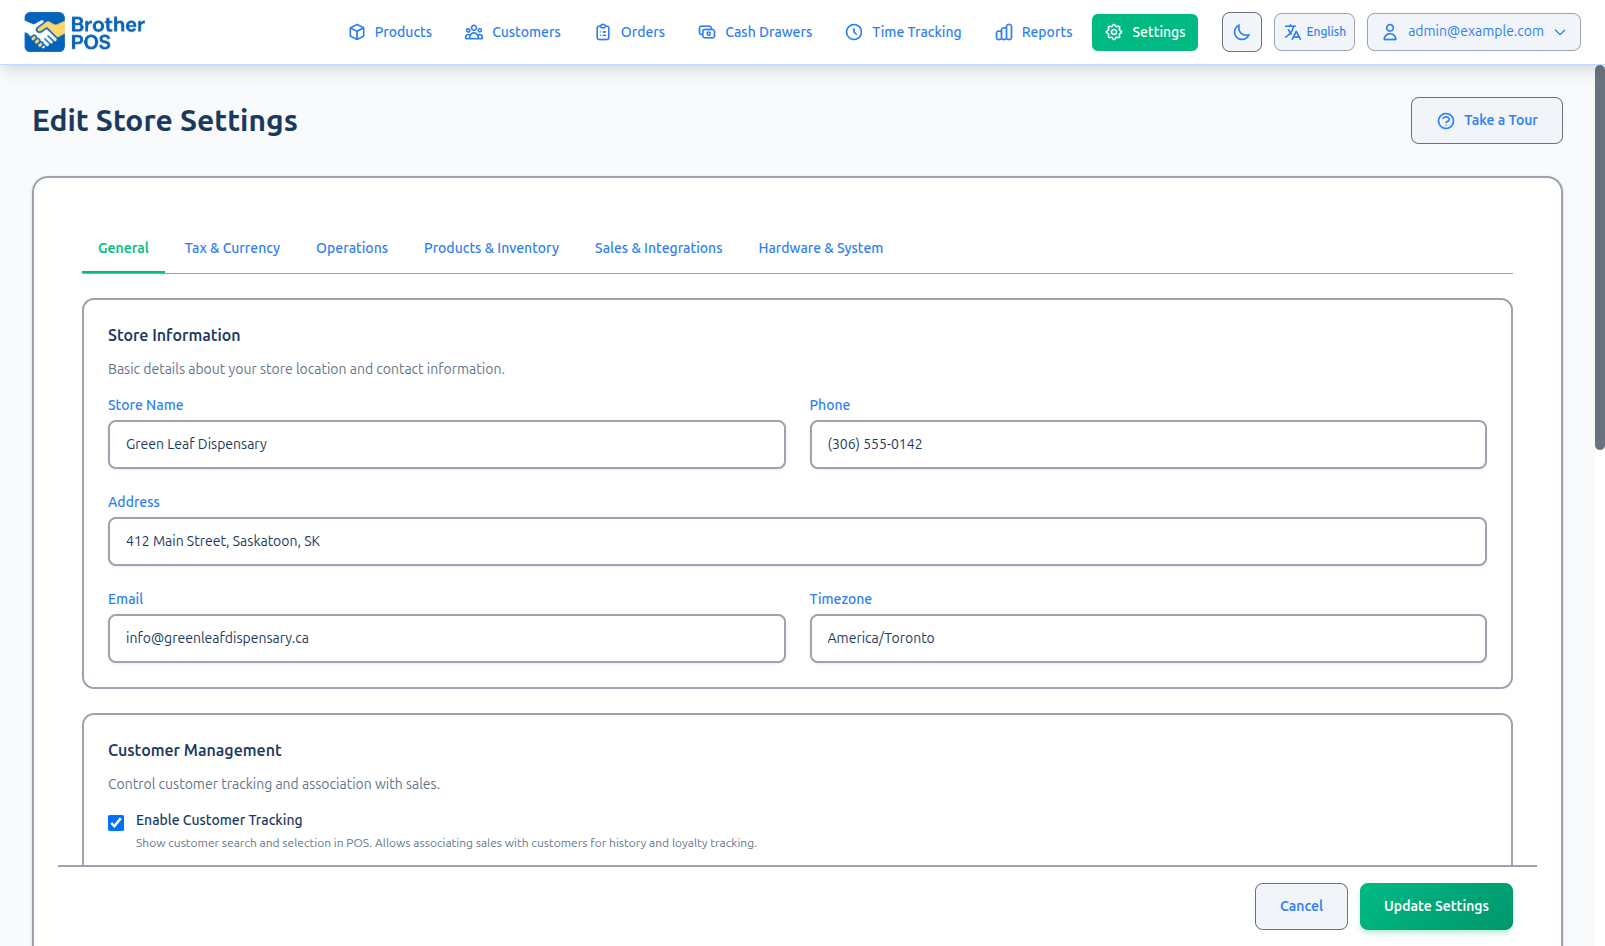
Navigate to Settings in the top navigation bar, then find the General tab.
Fill in your store's basic information:
| Field | Description | Example |
|---|---|---|
| Store Name | Your business name as it appears on receipts and the POS | "Green Leaf Dispensary" |
| Address | Full street address | "123 Main St" |
| City | City name | "Saskatoon" |
| Province/State | Province or state | "SK" |
| Postal Code | Postal or ZIP code | "S7K 1A1" |
| Phone | Store phone number | "(306) 555-0123" |
| Store contact email | "info@greenleaf.ca" | |
| Timezone | Your local timezone | "America/Regina" |
| Currency | Currency for all transactions | "CAD" |
The timezone setting affects how timestamps appear on receipts, reports, and the POS. All data is stored internally in UTC, but displayed in your local timezone. Make sure this is set correctly — changing it later will not alter past data, but it will change how times appear on future reports.
Click "Save" after filling in all fields.
2. Tax Configuration
Navigate to Settings in the top navigation bar, then click the Tax & Currency tab.
Tax setup depends on your jurisdiction. Brother POS supports three tax models:
Single Tax Rate (e.g., Ontario HST)
If your province uses a single combined tax:
- Set the Tax Rate to the combined percentage (e.g.,
13for 13% HST). - Set the Tax Label to what should appear on receipts (e.g., "HST").
- Leave Split Tax disabled.
Split Tax Rate (e.g., Saskatchewan GST + PST)
If your province has separate federal and provincial taxes:
- Enable Split Tax Mode.
- Set the GST Rate (e.g.,
5for 5%). - Set the GST Label (e.g., "GST").
- Set the PST Rate (e.g.,
6for 6%). - Set the PST Label (e.g., "PST").
Additional Tax (e.g., SK Vapour Products Tax)
If your jurisdiction charges an additional tax on specific product types:
- Enable Additional Tax.
- Set the Additional Tax Rate (e.g.,
20for 20%). - Set the Additional Tax Label (e.g., "VPT").
- Configure which products or categories are subject to this tax.
Tax configuration directly affects every transaction. Before going live, verify your tax settings with your accountant or tax professional. Brother POS calculates tax on all sales automatically — incorrect settings will result in incorrect tax collection.
Click "Save" after configuring your tax settings.
Verify Your Tax Setup
After saving, create a quick test:
- Open the POS register.
- Add a product to the cart.
- Check that the tax breakdown on the cart matches your expectations.
- If the numbers look wrong, return to Settings and adjust.
3. Receipt Settings
Navigate to Settings in the top navigation bar, then click the Hardware & System tab.
Configure what appears on your printed receipts:
| Field | Description | Example |
|---|---|---|
| Receipt Header | Multi-line text area for the top of the receipt (store name, address, phone) | "Green Leaf Dispensary\n123 Main St, Saskatoon, SK\n(306) 555-0123" |
| Receipt Footer | Multi-line text area for the bottom of the receipt | "Thank you for your purchase!\nReturns within 14 days with receipt" |
Additional Receipt Options
- Hide cashier on receipt — When enabled, the cashier's name is not printed on receipts.
Your receipt is often the last thing a customer sees. Include your store name, address, phone number, and a friendly thank-you message. For cannabis stores, check if your local regulations require specific information on receipts.
Click "Save" after configuring.
4. User Accounts
Navigate to Settings in the top navigation bar, then click the Manage Users link at the top of the page.
Create accounts for everyone who will use Brother POS.
Planning Your Accounts
Before creating accounts, plan out your team:
| Staff Member | Role | Needs Admin Access? | Needs POS Access? |
|---|---|---|---|
| Store owner / IT admin | Admin | Yes | Optional |
| Shift managers | Manager | Yes | Yes |
| Cashiers | Clerk | No | Yes |
| Delivery drivers | Driver | No | No (uses Driver App) |
Creating Each Account
For each staff member:
- Click "New User" or "Add User".
- Enter their name, email, and a temporary password.
- Select the appropriate role.
- Set a PIN (4 digits) for POS access.
- Click "Save".
Plan your PINs before creating accounts to ensure uniqueness. A simple scheme:
- Managers: 1000-1999
- Cashiers: 2000-2999
- Admins: 9000-9999
This makes it easy to assign PINs without collisions and helps identify roles at a glance during audits.
Minimum Recommended Accounts
At minimum, you should create:
- 1 Admin account — for system configuration (this is likely your own account)
- 1 Manager account — for day-to-day operations (if different from the admin)
- 1 Clerk account per cashier — for POS register access
Every person should have their own account. Shared accounts make it impossible to track who processed which transaction, which creates accountability issues during cash reconciliation and auditing.
5. Product Categories
Navigate to Products in the top navigation bar, then click the Categories link.
Before adding products, set up your category structure. Categories organize products on the POS register and in reports.
Recommended Cannabis Categories
| Category | Products |
|---|---|
| Flower | Dried cannabis, pre-rolls |
| Edibles | Gummies, chocolates, beverages |
| Concentrates | Shatter, wax, live resin, hash |
| Vapes | Cartridges, disposable pens |
| Topicals | Creams, balms, oils |
| Accessories | Grinders, papers, pipes, lighters |
| CBD | CBD-only products |
| Seeds | Cannabis seeds |
Creating Categories
For each category:
- Click "New Category" or "Add Category".
- Enter the category name.
- Optionally set a display order (controls the order in which categories appear on the POS).
- Click "Save".
Too many categories slow cashiers down. Aim for 5-10 top-level categories. You can use product attributes (strain type, brand) for more granular filtering.
6. Products
Navigate to Products in the top navigation bar.
Adding Products One by One
For small catalogs or individual products:
- Click "New Product".
- Fill in the required fields (Name, SKU, Price, Category, Stock).
- Add optional details (description, THC/CBD %, strain type, images).
- Click "Save".
See the Admin Quick Start for a detailed walkthrough of adding a single product.
Bulk Import via CSV
For large catalogs, import products from a CSV file:
- Navigate to Products > Import.
- Download the CSV template to see the expected column format.
- Fill in the template with your product data.
- Upload the completed CSV file.
- Review the import preview for any errors.
- Confirm the import.
- Ensure every product has a unique SKU. Duplicates will cause import errors.
- Prices should be pre-tax (tax is calculated at the point of sale).
- Stock quantities should reflect your current physical count.
Product Fields Reference
| Field | Required | Description |
|---|---|---|
| Name | Yes | Product display name |
| SKU | Yes | Unique identifier (for barcodes) |
| Price | Yes | Pre-tax retail price |
| Category | Yes | Product category |
| Current Stock | Yes | Units currently in stock |
| Description | No | Product description |
| THC % | No | THC percentage (cannabis) |
| CBD % | No | CBD percentage (cannabis) |
| Strain Type | No | Indica / Sativa / Hybrid |
| Brand | No | Manufacturer or brand name |
| Weight | No | Product weight (for weight-based items) |
| Cost Price | No | Your wholesale cost (for margin reports) |
| Barcode | No | UPC or custom barcode number |
7. Feature Flags
Navigate to Settings in the top navigation bar, then click the Products & Inventory tab (for cannabis and product-related flags) or the Sales & Integrations tab (for integrations and business feature flags).
Brother POS has many optional features that can be enabled or disabled per store. Review this list and enable only what your store needs:
Cannabis Features
| Feature | Default | Description |
|---|---|---|
| Cannabis Features | On | Master toggle for all cannabis-specific functionality |
| Quality Tiers | On | AA/AAA/AAAA/AAAA+ quality tier pricing matrices |
| Weight Presets | On | Predefined weight options (1g, 3.5g, 7g, etc.) |
| Show THC/CBD | On | Display THC and CBD percentages on POS |
| Show Strain Type | On | Show Indica/Sativa/Hybrid on products |
| Show Effects | On | Display effect tags (Relaxed, Energetic, etc.) |
| Show Dominant Terpene | On | Display dominant terpene information |
| Show Medical Benefits | On | Display medical benefit / "Helps With" tags on products |
Business Features
| Feature | Default | Description |
|---|---|---|
| Label Printing | Off | Enable product label printing |
| Time Tracking | Off | Employee clock-in/clock-out |
| Scale Integration | Off | Connect to USB scales for weight-based sales |
| Local Delivery | Off | Delivery zones and driver management |
| Shipping | Off | Ship-to-customer with rate calculation |
| B2B Wholesale | Off | Wholesale ordering and receiving |
| Consignment | Off | Consignment inventory tracking |
| Payouts | Off | Track vendor payouts |
| Additional Tax | Off | Extra tax types beyond GST/PST/HST |
Enable only the features you need right now. You can always turn on additional features later. Fewer active features means a simpler interface for your staff to learn.
8. Hardware Setup
Receipt Printer
Brother POS supports network-connected ESC/POS receipt printers. The recommended model is the Epson TM-m30II.
To configure your receipt printer:
- Connect the printer to your store's network (Ethernet or Wi-Fi).
- Note the printer's IP address (usually displayed on a self-test printout or found in the printer's network settings).
- Printer IP addresses are configured per-register in the POS Settings, not in store settings. Open the POS on the register, go to Printer Settings in the header, and enter the printer's IP address there.
Barcode Scanner
USB barcode scanners work in keyboard wedge mode — they plug into your register's USB port and act like a keyboard. No configuration is needed in Brother POS.
- Plug the scanner into your register's USB port.
- Open the POS register.
- Scan a product barcode — the POS should find and add the matching product.
Scan a product barcode while a text editor (like Notepad) is focused. You should see the barcode number appear as typed text followed by an Enter keystroke. If this works, the scanner will work with Brother POS.
Cash Drawer
Cash drawers connect to your receipt printer via an RJ11/RJ12 cable through the printer's DK port. When Brother POS opens the drawer (for example, during a cash sale), it sends the open command through the printer.
- Connect the cash drawer's cable to the receipt printer's DK (drawer kick) port.
- No additional configuration is needed in Brother POS — the drawer opens automatically with cash transactions.
Label Printer
If you have enabled the Label Printing feature:
- Connect your ZPL/EPL label printer to the network.
- Printer IP addresses are configured per-register in the POS Settings, not in store settings. Open the POS on the register, go to Printer Settings in the header, and enter the label printer's IP address there.
- Configure label dimensions to match your label stock.
Scale
If you have enabled the Scale Integration feature:
- Connect the USB scale to your register computer.
- The POS will auto-detect the scale's baud rate.
- If auto-detection fails, you can set the baud rate manually in Settings under the Hardware & System tab.
The scale uses the Web Serial API, which requires browser permission. When prompted, grant the POS access to the serial port. This prompt may appear the first time you try to read the scale.
9. Loyalty Program
The loyalty toggle and points-per-dollar rate are in Settings > General tab. Loyalty tiers and rewards are managed on a separate page.
If you want to reward repeat customers:
-
In Settings > General tab, enable the loyalty program and configure the points per dollar spent (e.g., 1 point per $1).
-
Navigate to Customers page, then click the Loyalty link (when loyalty is enabled). From there, navigate to Loyalty Tiers or Loyalty Rewards pages.
-
Set up loyalty tiers with their discount percentages:
Tier Points Required Discount Bronze 0 0% Silver 500 5% Gold 1,500 10% Platinum 5,000 15% -
Configure any redemption rules (e.g., how many points can be redeemed per transaction).
-
Click "Save".
Loyalty points are automatically earned and applied when cashiers attach a customer to a sale at the POS.
10. Compliance Settings
Navigate to Settings in the top navigation bar, then click the Tax & Currency tab to find the compliance settings.
This section is only relevant if your store sells cannabis and is required to report to a regulatory body.
If your store is in Saskatchewan, configure your SLGA Site ID and daily purchase limits in Settings > Tax & Currency tab under Saskatchewan Compliance.
- Enter your Site ID as provided by SLGA.
- Configure daily purchase limits (the system will track equivalent grams per customer per day).
- Review the compliance dashboard to verify everything is configured correctly.
Note: Only SK SLGA compliance is currently implemented.
If you are a licensed cannabis retailer, compliance reporting is not optional. Ensure these settings are configured correctly before processing any sales. Consult with your compliance officer or legal advisor if you are unsure about any settings.
Pre-Launch Checklist
Before telling your staff the system is live, run through this final checklist:
Must-Have
- Store name and address are correct
- Tax rates are configured and verified
- Receipt header and footer look professional
- All staff have individual accounts with PINs
- Product categories are set up
- At least a few products are loaded (ideally all)
- A test sale has been completed successfully on the POS
- Receipt prints correctly (if a printer is connected)
Should-Have
- Feature flags reviewed and set appropriately
- Receipt printer connected and tested
- Barcode scanner tested
- Cash drawer tested (opens on cash sale)
- Staff have been given their login credentials
Nice-to-Have
- Loyalty program configured
- Product images uploaded
- Compliance settings configured (cannabis stores)
- WooCommerce integration set up
- All products imported via CSV
What's Next?
- User Roles & Permissions — Review the full permission matrix for your team.
- Navigating the Admin — Learn every section of the admin panel.
- POS Quick Start — Walk through the cashier experience yourself.
- Admin Quick Start — A faster walkthrough of the essentials.