Navigating the Admin Panel
The Admin Panel is where you manage everything behind the scenes — products, inventory, users, reports, settings, and integrations. This guide walks you through every section of the interface so you always know where to find what you need.
Accessing the Admin Panel
Open your browser and navigate to your store's URL:
https://storename.brotherpos.ca
Log in with your email and password. You will land on the Dashboard — the admin panel's home page.
Some navigation items only appear when their feature flag is enabled. For example, Time Tracking only shows if time tracking is turned on in Settings. If you cannot find a menu item described here, it may be disabled for your store or restricted to Admin-only access. See User Roles & Permissions for details.
The Navigation Bar
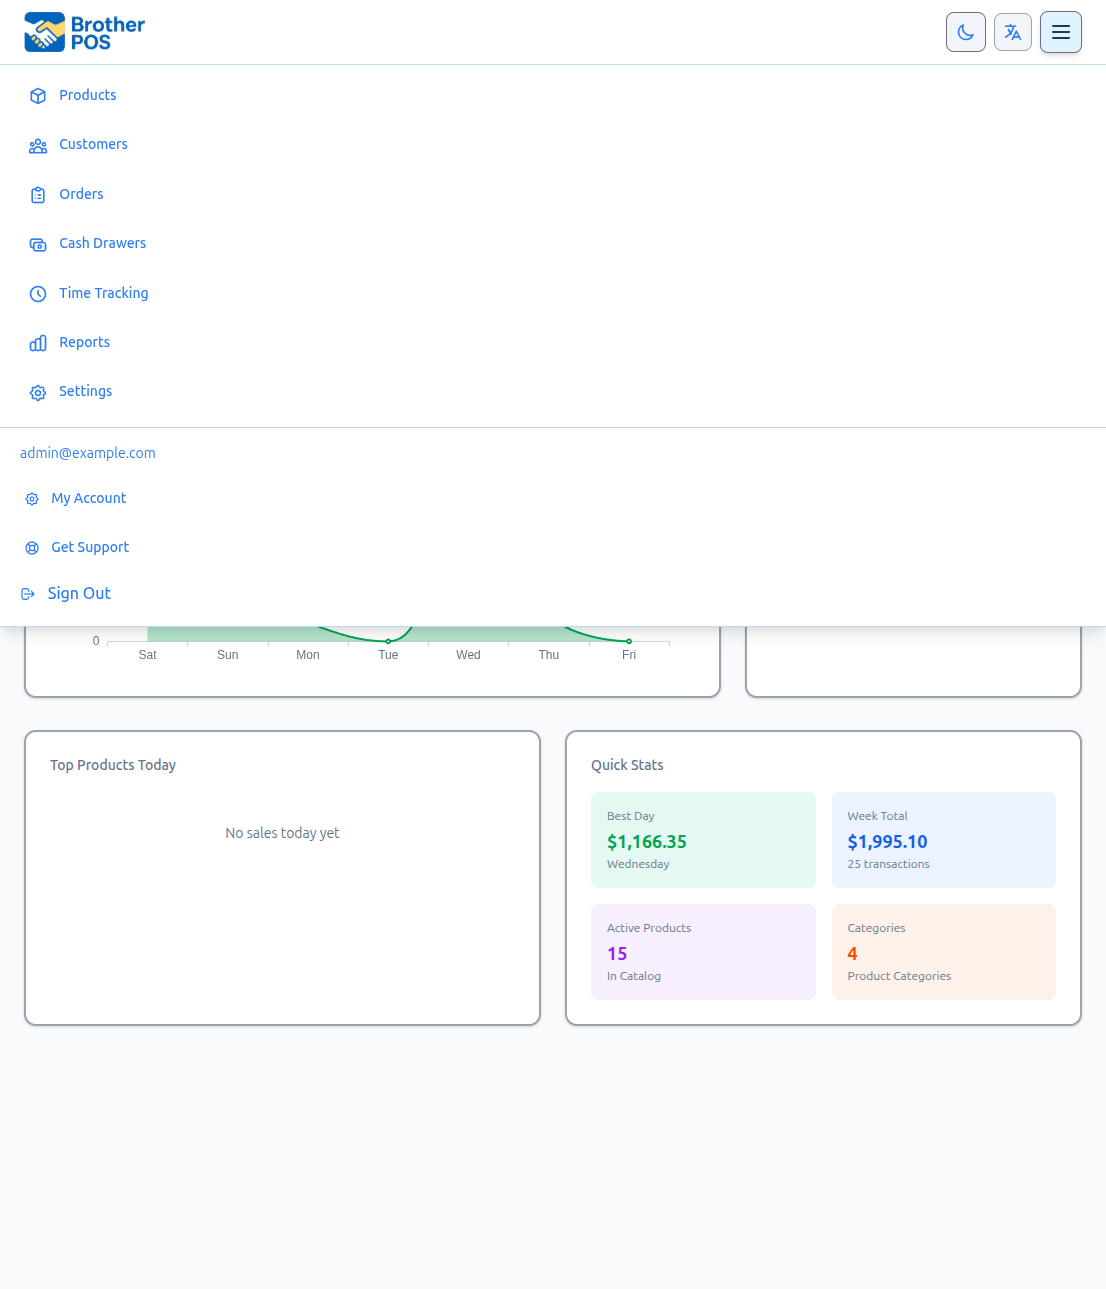
The top navigation bar is your primary navigation tool. It is always visible across every page. Here are the main sections:
| Nav Item | URL | Description |
|---|---|---|
| Logo | / | Click to return to the Dashboard |
| Products | /products | Product catalog management |
| Customers | /customers | Customer database and loyalty |
| Orders | /orders | Sales history and order management |
| Cash Drawers | /cash_drawer_sessions | Cash drawer session history |
| Time Tracking | /admin/time_entries | Employee clock-in/out records |
| Reports | /reports | Sales, inventory, and analytics reports |
| Settings | /store_settings | Store configuration and system settings |
The right side of the navigation bar also contains:
- Theme toggle — Switch between light and dark mode.
- Language selector — Change the admin panel language.
- User menu — Click your email to access your profile or log out.
Click the Brother POS logo in the top-left corner from any page to return to the Dashboard.
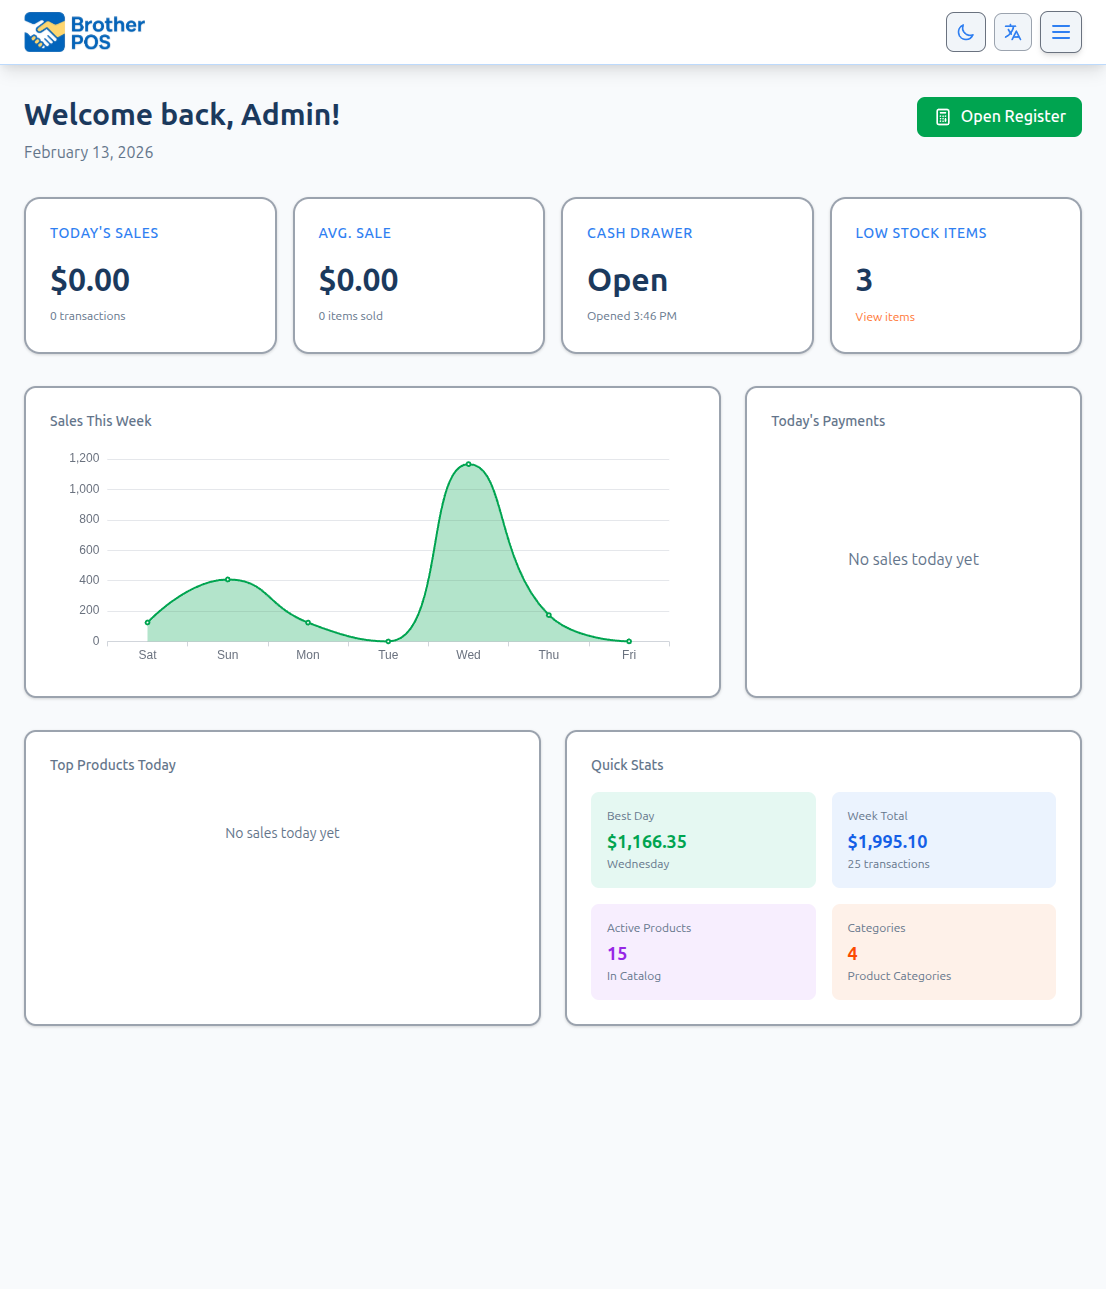
Dashboard
The Dashboard is your landing page when you log in. It provides a quick overview of your store's current state:
- Today's Sales — Total revenue and transaction count for the current day.
- Average Sale — Average transaction value and total items sold today.
- Cash Drawer — Whether a drawer is currently open and when it was opened.
- Low Stock Items — Count of products below their minimum stock threshold, with a link to view them.
- Sales This Week — A chart showing daily sales for the current week.
- Today's Payments — Breakdown of payment methods used today.
- Today's Revenue Mix — Splits today's revenue across Product, Service, and Manual line items, so you can see at a glance whether the day was driven by retail product sales, system-generated service charges (green fees, lodging, etc.), or manual one-off entries. Hidden until there's revenue to show.
- Top Products Today — Best-selling products for the current day.
- Quick Stats — Best day this week, week total, active product count, and category count.
The Dashboard also has an Open Register button to quickly launch the POS interface.
Check the Dashboard first thing when you arrive. It tells you at a glance whether drawers are open, if any products need restocking, and how the current day is going.
Products
Nav item: Products
This section is where you manage your entire product catalog.
Product List
The main Products page shows all products in a searchable, filterable list:
- Search by product name, SKU, or barcode using the search bar (also accessible with
Ctrl+K) - Filter by category, stock status (in stock, low stock, out of stock), active/inactive status, or brand
- Inline editing — Click the edit icons next to a product's name, price, image, stock, or categories to quickly update them without opening the full edit page
- Actions menu — Expand the actions on any product to Edit, Duplicate, view Barcode, Deactivate, or Delete
The Products page also provides links to Categories and Add New Product at the top.
Product Detail / Edit
Each product page shows:
- Basic information — Name, SKU, price, category, description
- Stock information — Current stock level, cost price, supplier
- Cannabis details (if enabled) — THC%, CBD%, strain type, terpenes, effects
- Images — Product photos and gallery images
- Pricing — Regular price, quality tier pricing, weight-based pricing
- Barcode — Product barcode for scanning
Customers
Nav item: Customers
Manage your customer database:
- Customer list — Searchable table showing name, email, phone, loyalty points, tier, purchase count, and total spent
- Customer detail — Click a customer name to view their full profile and purchase history
- Add New Customer — Create new customer records manually
- Loyalty — Link at the top to manage loyalty program settings (tiers, points, rewards)
- Edit / Delete — Action buttons on each customer row
Orders (Sales History)
Nav item: Orders
The Orders page (titled Sales on the page itself) is where you view and manage all transactions.
- Summary cards — Total Sales count, Total Revenue, and Voided Sales at the top
- Filters — Search by order ID or customer name, filter by status (Completed/Voided), fulfillment type (In-Store/Pickup/Delivery/Shipping), payment method, and date range
- Transaction table — Columns for Order ID, Type, Fulfillment, Date/Time, Customer, Items, Total, Payment method, Status, and Actions
- View — Click View on any order to see full details, line items, and payment information
The page also links to Consignment management if that feature is enabled.
Cash Drawers
Nav item: Cash Drawers
View and manage cash drawer sessions:
- Active sessions — A banner at the top shows any currently open drawers
- Filters — Filter by register, status (Open/Closed), and date range
- Session table — Columns for Session ID, Register, Opened date, Closed date, Opened By, Sales count, Total, Status, and Actions
- Manage Registers — Link at the top to configure your store's registers
- View — Click View on any session to see the full session detail with reconciliation
Cash drawer sessions are opened and closed manually — they do not open or close automatically when users log in or out of the POS. A manager or admin opens the drawer with a starting float, and closes it with a cash count at the end of the shift.
Time Tracking
Nav item: Time Tracking (only visible when time tracking is enabled)
View employee timesheets, clock-in/out records, and break history. This page is also accessible from Reports > Employee Time Tracking.
Reports
Nav item: Reports
The Reports page is a hub linking to all analytics and reporting tools:
| Report | Description |
|---|---|
| Sales Report | Sales data, trends, revenue, tax collected, payment method breakdown |
| Inventory Report | Stock levels, movements, and adjustments |
| Current Cash Drawer | Today's cash drawer status |
| Inventory Turnover | Slow movers, dead stock, and reorder needs |
| Margin Analysis | Profitability by product and category |
| Customer Analytics | Customer lifetime value and retention |
| End of Day Report | Daily summary — transactions, revenue, staff sales, top products |
| Audit Trail | All system changes with ability to undo |
| Employee Time Tracking | Timesheets and clock-in/out records |
| Compliance Reports | Regulatory compliance reports (if applicable) |
Settings
Nav item: Settings
Admin Most settings are Admin only. Managers may see a limited view.
The Settings page is organized into seven tabs:
General
- Store name, address, phone, email
- Timezone
- Customer tracking toggle
- Loyalty program configuration (points per dollar)
Tax & Currency
- Province and tax mode (single or split GST/PST)
- GST and PST rates and labels
- Currency symbol
- Additional tax configuration (e.g., Vape Product Tax)
- Compliance settings (SLGA Site ID, daily purchase limits)
Operations
- Default opening float for cash drawers
- Time tracking toggle
- Consignment toggle
- POS payouts toggle
- Payment types (cash, debit, e-transfer, store credit)
Products & Inventory
- Quality Tiers toggle (AA/AAA/AAAA/AAAA+ pricing matrices)
- Weight presets toggle
- Barcode scanning toggle
- Product images toggle
- Stock management (negative stock, multi-location)
- Cannabis detail fields (THC/CBD, strain type, strain library, effects, dominant terpene)
- Print menu configuration
Sales & Integrations
- Payment terminal integration
- Digital menu boards
- Customer display
- Restaurant features (modifiers, kitchen tickets, tips)
- Delivery & Shipping toggles
Hardware & System
- Receipt printing toggle
- Label printing toggle
- Scale integration toggle
- Automatic label printing rules
- Automated backup settings
Notifications
- Email Receipts toggle — automatically email receipts to customers after each sale
- Scheduled Report Digest — daily or weekly sales summaries emailed to configured recipients
- Auto-Reorder Alerts — draft purchase orders or alerts when products fall below their reorder point
The Settings page also provides quick-access links at the top:
- Manage Users — Opens the Staff Members page
- WooCommerce Integration — Opens WooCommerce configuration
- WooCommerce Monitor — Opens the WooCommerce sync health dashboard (only visible when WooCommerce is configured)
- Edit Settings — Opens the settings edit form
- Take a Tour — Launches a guided tour of the settings
Staff Members (Users)
Admin Admin only — accessed from Settings > Manage Users
The Staff Members page is where you manage all user accounts. It is not a direct navigation bar item — you access it from the Manage Users link on the Settings page, or navigate directly to /users.
- User table — Shows name, email, role, status, last login, total logins, and action buttons
- Add Staff Member — Create new accounts with name, email, password, role, and PIN
- Edit — Modify user details, change roles, reset PINs
- Remove — Remove a staff member's account
- Role Permissions — Link to configure what each role can access
- Time Clock — Link to employee time tracking
Campaigns & Pricing
Campaigns are managed through dedicated pages rather than a top-level navigation item:
- Sale Campaigns — Set percentage or dollar-off discounts targeting specific products or categories with date ranges
- Freebie Campaigns — Define spend thresholds that trigger a free item
These can be accessed from the Products area or through direct URLs.
Integrations
Integrations are configured through the Settings page rather than a separate navigation item:
- WooCommerce — Access from the WooCommerce Integration link on the Settings page. Configure your online store connection, product sync, order sync, and inventory push.
- B2B Wholesale — If enabled via feature flags, manage distributor connections and wholesale operations.
Tips for Efficient Navigation
Search
Use the product search on the Products page to quickly find items. The search bar supports Ctrl+K as a keyboard shortcut. Search works across:
- Product name
- SKU
- Barcode number
Filters
Tables throughout the admin panel support:
- Dropdown filters — Above tables to narrow results by category, status, date range, etc.
- Pagination — Navigate through large datasets with page controls at the bottom
- Clear Filters — Reset all filters with one click
Guided Tours
Many pages include a Tour button that launches an interactive walkthrough explaining each section of the page. This is a great way to learn the interface when you first start using it.
Manager vs. Admin View
If you are a Manager, some navigation items and features will differ compared to an Admin:
| Section | Admin | Manager |
|---|---|---|
| Products | Full access | Full access |
| Customers | Full access | Full access |
| Orders | Full access | Full access |
| Cash Drawers | Full access | Full access |
| Time Tracking | Full access | Full access |
| Reports | Full access | Full read access (accessible via direct URL) |
| Settings | Full access | No access (except locale update) |
| Staff Members | Full access | No access |
If you need access to a section that is not visible, contact your store's administrator.
Mobile and Tablet Access
The Admin Panel is responsive and works on tablets and mobile devices, though it is optimized for larger screens. On smaller screens:
- The navigation bar collapses into a hamburger menu
- Tables may scroll horizontally
- Forms stack vertically
For the best admin experience, use a desktop or laptop computer with a full-sized screen. The POS Register is designed for touch and tablets — the Admin Panel is designed for traditional computers.
What's Next?
- Navigating the POS — Learn the POS register interface.
- Store Setup — Complete first-time store configuration.
- User Roles & Permissions — Review what each role can access.
- Admin Quick Start — Add your first product and get selling.