Receipt Printing
Use this page to set up the receipt printer for a register, and to reprint a receipt.
Quick steps
To set up the printer:
- Turn receipt printing on for your store (once, by an admin): Settings > Edit Settings, Hardware & System tab, tick Enable Receipt Printing under Printing Features, then Update Settings. Ticking Receipt printer in the setup wizard does the same.
- On a computer, make sure the Printer Bridge is running. On the iPad or Android app, skip this — the printer connects to the tablet.
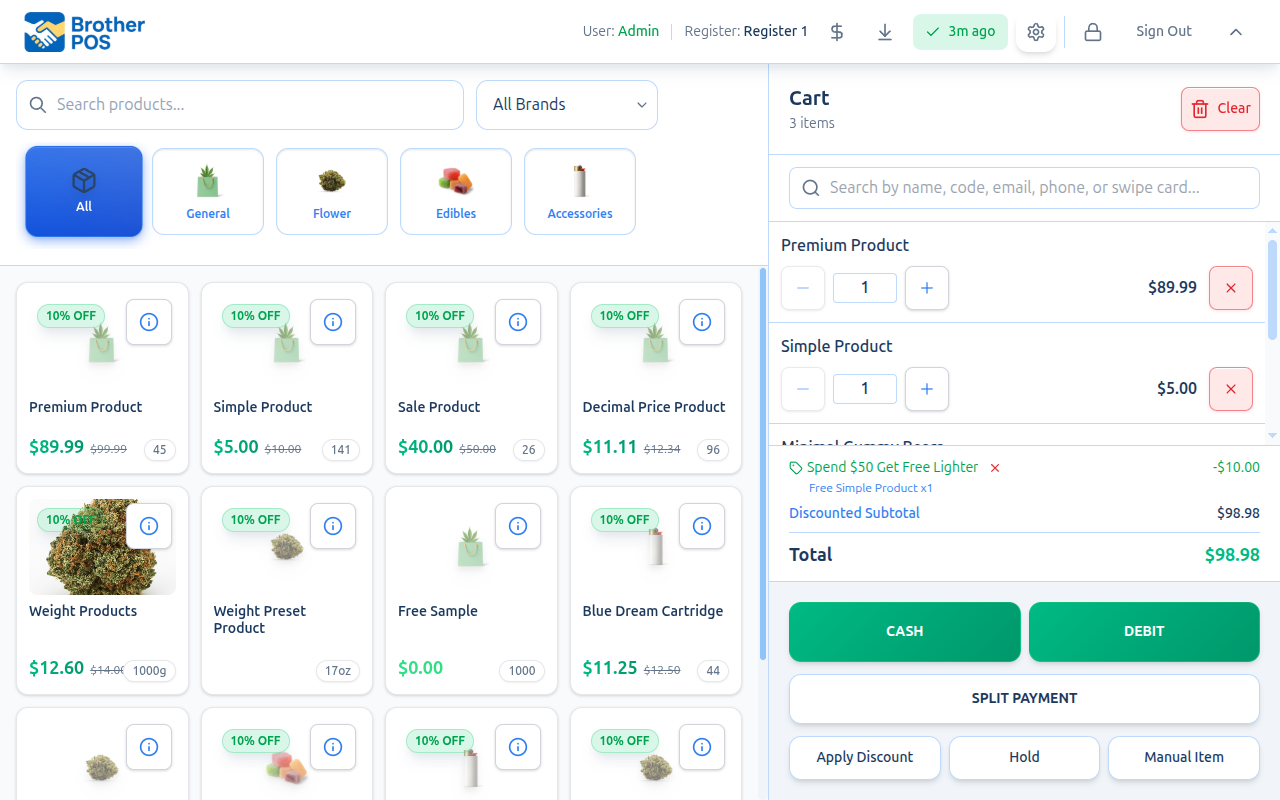
- Tap the gear button (Settings) in the register's top bar.
- Tick Enable receipt printer and Print receipts after sales.
- On a computer: tap Auto-Detect (or type the Printer IP Address). On the iPad or Android app: in Receipt Printer (Bluetooth / Network), tap Search for Receipt Printers, then tap your printer.
- Tap Test Print, then save.
To reprint a receipt:
- With the cart empty, find the sale under Recent Sales in the cart panel and tap it.
- Tap Print.
Common questions
The receipt didn't print after a sale. Check that Print receipts after sales is ticked for this register. On a computer, check the Printer Bridge is running.
The cash drawer doesn't open. The drawer opens through the receipt printer. Check the cable between the printer and the drawer.
We don't have a receipt printer. Can the customer still get a receipt? Yes. Sales History shows View receipt instead of Print, where you can print it on any printer or email it.
Where do I change the store name or the thank-you line on the receipt? Those are store-wide settings in the admin under Settings > Edit Settings > Hardware & System. Ask your admin.
More detail: before you begin, and how printing works
Brother POS prints receipts on ESC/POS compatible thermal printers, and on Star printers through the iPad or Android app or a Linux Printer Bridge. Receipts can print automatically when a sale is completed, or on demand from Sales History. This page covers how receipt printing works, how to set it up, and how to fix common issues.
Before You Begin
- On a computer: your receipt printer must be an ESC/POS compatible printer, and the Printer Bridge must be installed and running on that computer (Windows or Linux). Brother POS runs in the cloud, so the bridge is what passes print jobs from the POS in your browser to the printer. See Printer Bridge.
- On the iPad or Android app: the printer connects straight to the tablet, over your network or Bluetooth. No bridge is needed.
- Printer settings belong to each register. Admins set them under Registers in the admin (reached from the Cash Drawers page or the Settings page), and staff can also set them from the POS Settings (gear).
The Epson TM-m30II is the recommended receipt printer for Brother POS. It supports ESC/POS commands and has a cash drawer port.
How Receipt Printing Works
Automatic Printing
When Print receipts after sales is on for your register:
- A sale is completed (payment processed).
- Brother POS sends the receipt to the register's printer.
- The receipt prints with no cashier action needed.
- For a cash sale, the cash drawer is opened separately from the receipt print. The two usually happen at about the same time.
Manual Printing
From Sales History:
- Select a completed sale.
- Tap Print.
- The receipt is sent to the printer.
You can reprint any sale as many times as needed.
Stores Without a Receipt Printer
If Enable Receipt Printing is off for your store (an admin sets it under Settings > Edit Settings, Hardware & System tab, Printing Features), Sales History shows View receipt instead of Print. It opens the receipt on screen, laid out the same as a printed one, with:
- Print to print it on any printer this device can use.
- Email (when your store sends email receipts) to send it to the customer's email on file. If there isn't one, type an address and tap Send. For a customer attached to the sale, tick Save to name to keep that email on their profile.
Receipt Contents
A standard Brother POS receipt includes:
| Section | Content |
|---|---|
| Header | Store name, address and phone number |
| Sale info | Receipt number, date and time, and cashier name |
| Customer | Customer name and loyalty details, when a customer is attached to the sale |
| Line items | Product name, quantity, price and line total, with any modifiers. A free item from a promotion reads (FREE) with the promotion's name. |
| Discounts | Item-level and order-level discounts |
| Totals | Subtotal, tax and total. Stores with GST and PST see them on separate lines with their rates, for example GST (5%) and PST (6%). An additional tax such as the Vapour Products Tax gets its own line, with its rate when every taxed item on the sale uses the same one. If your store charges no tax, printed receipts leave the tax line off, on Star printers as well as other receipt printers, unless the sale itself carried tax. |
| Payment | Payment method; for cash, amount tendered and change. A split payment lists each method with its amount. Card payments show the card type, last four digits and approval code when the terminal sends them. |
| Footer | Your receipt footer text (e.g. "Thank you for your purchase!") |
Cannabis-Specific Content
For cannabis stores, receipts show the sale's total cannabis equivalent in grams when there is one.
More detail: printer settings, Bluetooth and Star printers, and the Printer Bridge
Printer Configuration
Setting Up a Printer From the POS
- Tap the gear button (Settings) in the POS top bar. This window is where the printer settings live (called Printer Settings on this page).
- Check that the right register is shown under Configuring printer for:.
- Tick Enable receipt printer.
- On a computer: enter the Printer IP Address and Printer Port, or tap Auto-Detect to find a Printer Bridge running on this computer. The default port is 9100.
- On the iPad or Android app: connect the printer in the Receipt Printer (Bluetooth / Network) section instead (see below).
- Tick Print receipts after sales if you want receipts to print automatically.
- Tap Test Print to check it works, then save.
Printer Settings Per Register
| Setting | Description | Default |
|---|---|---|
| Enable receipt printer | Whether this register prints receipts | On |
| Printer IP Address | Where the printer (usually the Printer Bridge) is reached from a computer | None |
| Printer Port | The port the bridge listens on for receipts | 9100 |
| Print receipts after sales | Print a receipt automatically when a sale completes | On |
| Open drawer without printing (cash sales only) | Open the cash drawer on cash sales but skip the receipt | Off |
Receipt header and footer text are store-wide settings, found in the admin under Settings > Edit Settings > Hardware & System, not per register.
Each register can have its own printer. In a multi-register setup, Register 1 can print to Printer A while Register 2 prints to Printer B. Settings saved on a register are shared by every device using that register.
Network and Bluetooth Printers (iPad or Android App)
In the iPad or Android app, you can connect a receipt printer on your network (an Epson TM-m30II, a Star or another network receipt printer) or a Bluetooth receipt printer straight to the tablet. Open the POS Settings (gear) and use the Receipt Printer (Bluetooth / Network) section:
- A network printer has to be on the same network as the tablet. A Bluetooth printer has to be paired in the iPad's Settings > Bluetooth first.
- Tap Search for Receipt Printers and wait a few seconds.
- Likely printers are listed first. Other Bluetooth devices nearby (watches, earbuds, phones) are hidden behind Show N other nearby device(s). Tap it if your printer has an unusual name and isn't in the main list.
- Tap your printer to connect.
For a network printer the search doesn't find, type its IP address under Or connect a network printer by its IP address and tap Connect.
If a Star printer won't show up, tap Printer search details after the search and share what it says with support. See Receipt Printers for more.
Printer Bridge
On a computer, the Printer Bridge is how your local printers connect to Brother POS. Since Brother POS is cloud-hosted, the browser needs the bridge to reach printers on your counter.
How It Works
- The Printer Bridge runs on a Windows or Linux computer at the till, usually the one the printer is plugged into by USB.
- The POS in your browser sends each receipt to the bridge.
- The bridge passes it on to your printer.
See Printer Bridge for detailed setup instructions.
More detail: the cash drawer, reprinting and kitchen tickets
Cash Drawer Integration
Most receipt printers have a DK port (RJ11/RJ12 connector) that can open a cash drawer. When your drawer is connected:
- Cash payments open the drawer automatically.
- Open Cash Drawer in the top bar opens it by hand. The button shows when the register has a receipt printer set up, your role is allowed to open the drawer, and Show cash drawer button in header is on in the POS Settings.
- Open Drawer to Count appears on the screen where you open a register's drawer. It shows when the register has a receipt printer set up, or when this device has its own receipt printer connected (for example a Bluetooth printer built into the stand). The app reconnects to that printer first, so the button works even if nothing has printed yet since the app opened.
The cash drawer plugs into the receipt printer with a cable, and the printer sends the signal that opens it. No separate driver is needed.
Reprinting Receipts
From Sales History
- Open Sales History from the Recent Sales section in the cart panel (visible when the cart is empty).
- Select the sale you want to reprint.
- Tap Print.
From the Admin Panel
Managers and admins can also print receipts from the admin:
- Go to Orders.
- Open the sale.
- Click Print Receipt.
Kitchen Tickets
If your store uses kitchen tickets, Brother POS can print a ticket for the items that need preparing. A kitchen ticket shows:
- The order number and time
- The items to prepare
- Modifiers and item notes
- The customer name and delivery details, for online and delivery orders
To reprint one, open the sale in Sales History and tap Kitchen Ticket.
One Printer for Receipts and Kitchen Tickets
If your store doesn't have a separate kitchen printer, kitchen tickets print on the receipt printer. This works for a Star printer connected to the tablet and for a receipt printer on the Printer Bridge.
That's controlled by Use Receipt Printer for Kitchen Tickets, found in the admin under Settings > Edit Settings > Hardware & System tab, in the Kitchen Ticket Printer section (not shown for cannabis stores). It's on unless someone has turned it off. If it's off and there's no kitchen printer, kitchen tickets don't print on the receipt printer.
If a kitchen ticket fails to print, the error message says why.
More detail: troubleshooting, paper rolls and best practices
Troubleshooting
| Problem | Solution |
|---|---|
| Receipt does not print on sale completion | Check that Print receipts after sales is on for your register. On a computer, check the Printer Bridge is running and the IP and port are right. |
| Printer is unreachable | Confirm the printer is on, and on a computer that the Printer Bridge is running. In the app, check the printer still shows Connected in the POS Settings. |
| Receipt prints garbled text | The printer may not support ESC/POS commands. A Star printer prints full receipts from the iPad or Android app, or a Linux Printer Bridge; on Windows tick Use Windows Driver (for Star/network printers) in the Printer Bridge for plain text. |
| Cash drawer does not open | Check the cable between the printer and drawer. It may be loose or the wrong type. |
| Receipt prints but is cut off | The paper roll may be running low. Replace it and try again. |
| Print does nothing | The printer may be offline. Check the printer and its connection. |
| Slow printing | If the bridge computer or printer is on Wi-Fi, try a network cable. |
Paper Rolls
Specifications
Most receipt printers use 80mm thermal paper rolls. Check your printer's documentation for the exact specifications:
| Specification | Common Value |
|---|---|
| Width | 80mm (3.15 inches) |
| Diameter | 80mm maximum roll diameter |
| Core | 12mm inner core |
| Type | Thermal (no ink required) |
Replacing Paper
- Open the printer cover (usually a lever or button on the front).
- Remove the empty roll.
- Place the new roll with the paper feeding from the bottom of the roll (print side faces up).
- Pull a small amount of paper past the cutter.
- Close the cover. The printer should cut and be ready.
Keep spare paper rolls near each register. Running out of paper during a busy period causes delays.
Best Practices
- Leave auto-print on. Manual printing adds an extra step to every sale.
- Test the printer at the start of each shift. Use Test Print in the POS Settings (gear).
- Keep spare paper rolls stocked. Thermal paper rolls are inexpensive and essential.
- Keep the bridge computer's address fixed. If the bridge runs on a different computer, give it a DHCP reservation on your router so its address doesn't change.
- Position the printer within reach. The cashier should be able to hand over the receipt without leaving the register.
- Clean the print head periodically. Dust and residue can degrade print quality over time.
What's Next?
- Label Printing — Print product labels with barcodes
- Barcode Scanner — Scan products for fast checkout
- Scale — Weigh products at the register